

Table of contents
- What is Jira
- What is a sprint?
- Create a Jira account
- Onboarding
- Creating your first project
- Setting up the next project
- Creating issues
- Configure Issue Types
- Pull in issues from other projects
- Filter issues by project
- Creating Sprints
- Sprint Setup
- Story Points and Estimates
- Configure issue fields
- Starting a sprint
- Change sprint columns
This post is very opionated, this covers how I like to work with sprints, you may work very differently.
Working in a team that does agile development is a great way to build software, but it can be tricky to manage multiple projects, what will be worked on and how to manage the tasks across projects.
This is where Jira shines. Managing multiple projects and their tasks becomes a lot easier with the setup that works for your team.
In this post, I'll explain the setup I use, for sprints and managing tasks.
I have multiple projects each with its own tasks (Jira calls them issues)
I create an All Projects project. This pulls in all issues from other projects to provide a central point to see all issues and sprints in one place.
What is Jira
Jira is primarily an issue-tracking application, it's heavily configurable. Focused on projects, managing issues, sprints, roadmaps and reporting.
Read more about Jira at https://www.atlassian.com/software/jira
What is a sprint?
A sprint covers a time period typically a 2-week block. Where tasks will have been pre-estimated and prioritised and put into the sprint
Say you have 5 people in a team, each person works full time and works 8 hours a day. You may want to allow 2 hours for none sprint work a day which leaves 6 hours each. Each person will have a capacity of 60 hours per sprint. The idea is to put 60 hours' worth of tasks into the sprint.
This offers multiple benefits:
Each person knows what they are working on for 2 weeks
Everyone is working towards a common goal
Your time is protected.
If a manager wants you to work on a 5 hour task they either have to remove a 5 hour tasks to keep you on track or queue the tasks for the next sprint. (This is not always the case but helps push back on unplanned work)
- The product owner (often the stakeholder) knows what to expect at the end of the sprint.
Read more about sprints https://www.atlassian.com/agile/scrum/sprints
Create a Jira account
To sign up go to https://www.atlassian.com/software/jira/free
Select the products you want to use, in addition to Jira, I'll select Confluence which goes hand in hand with Jira for managing project documents.
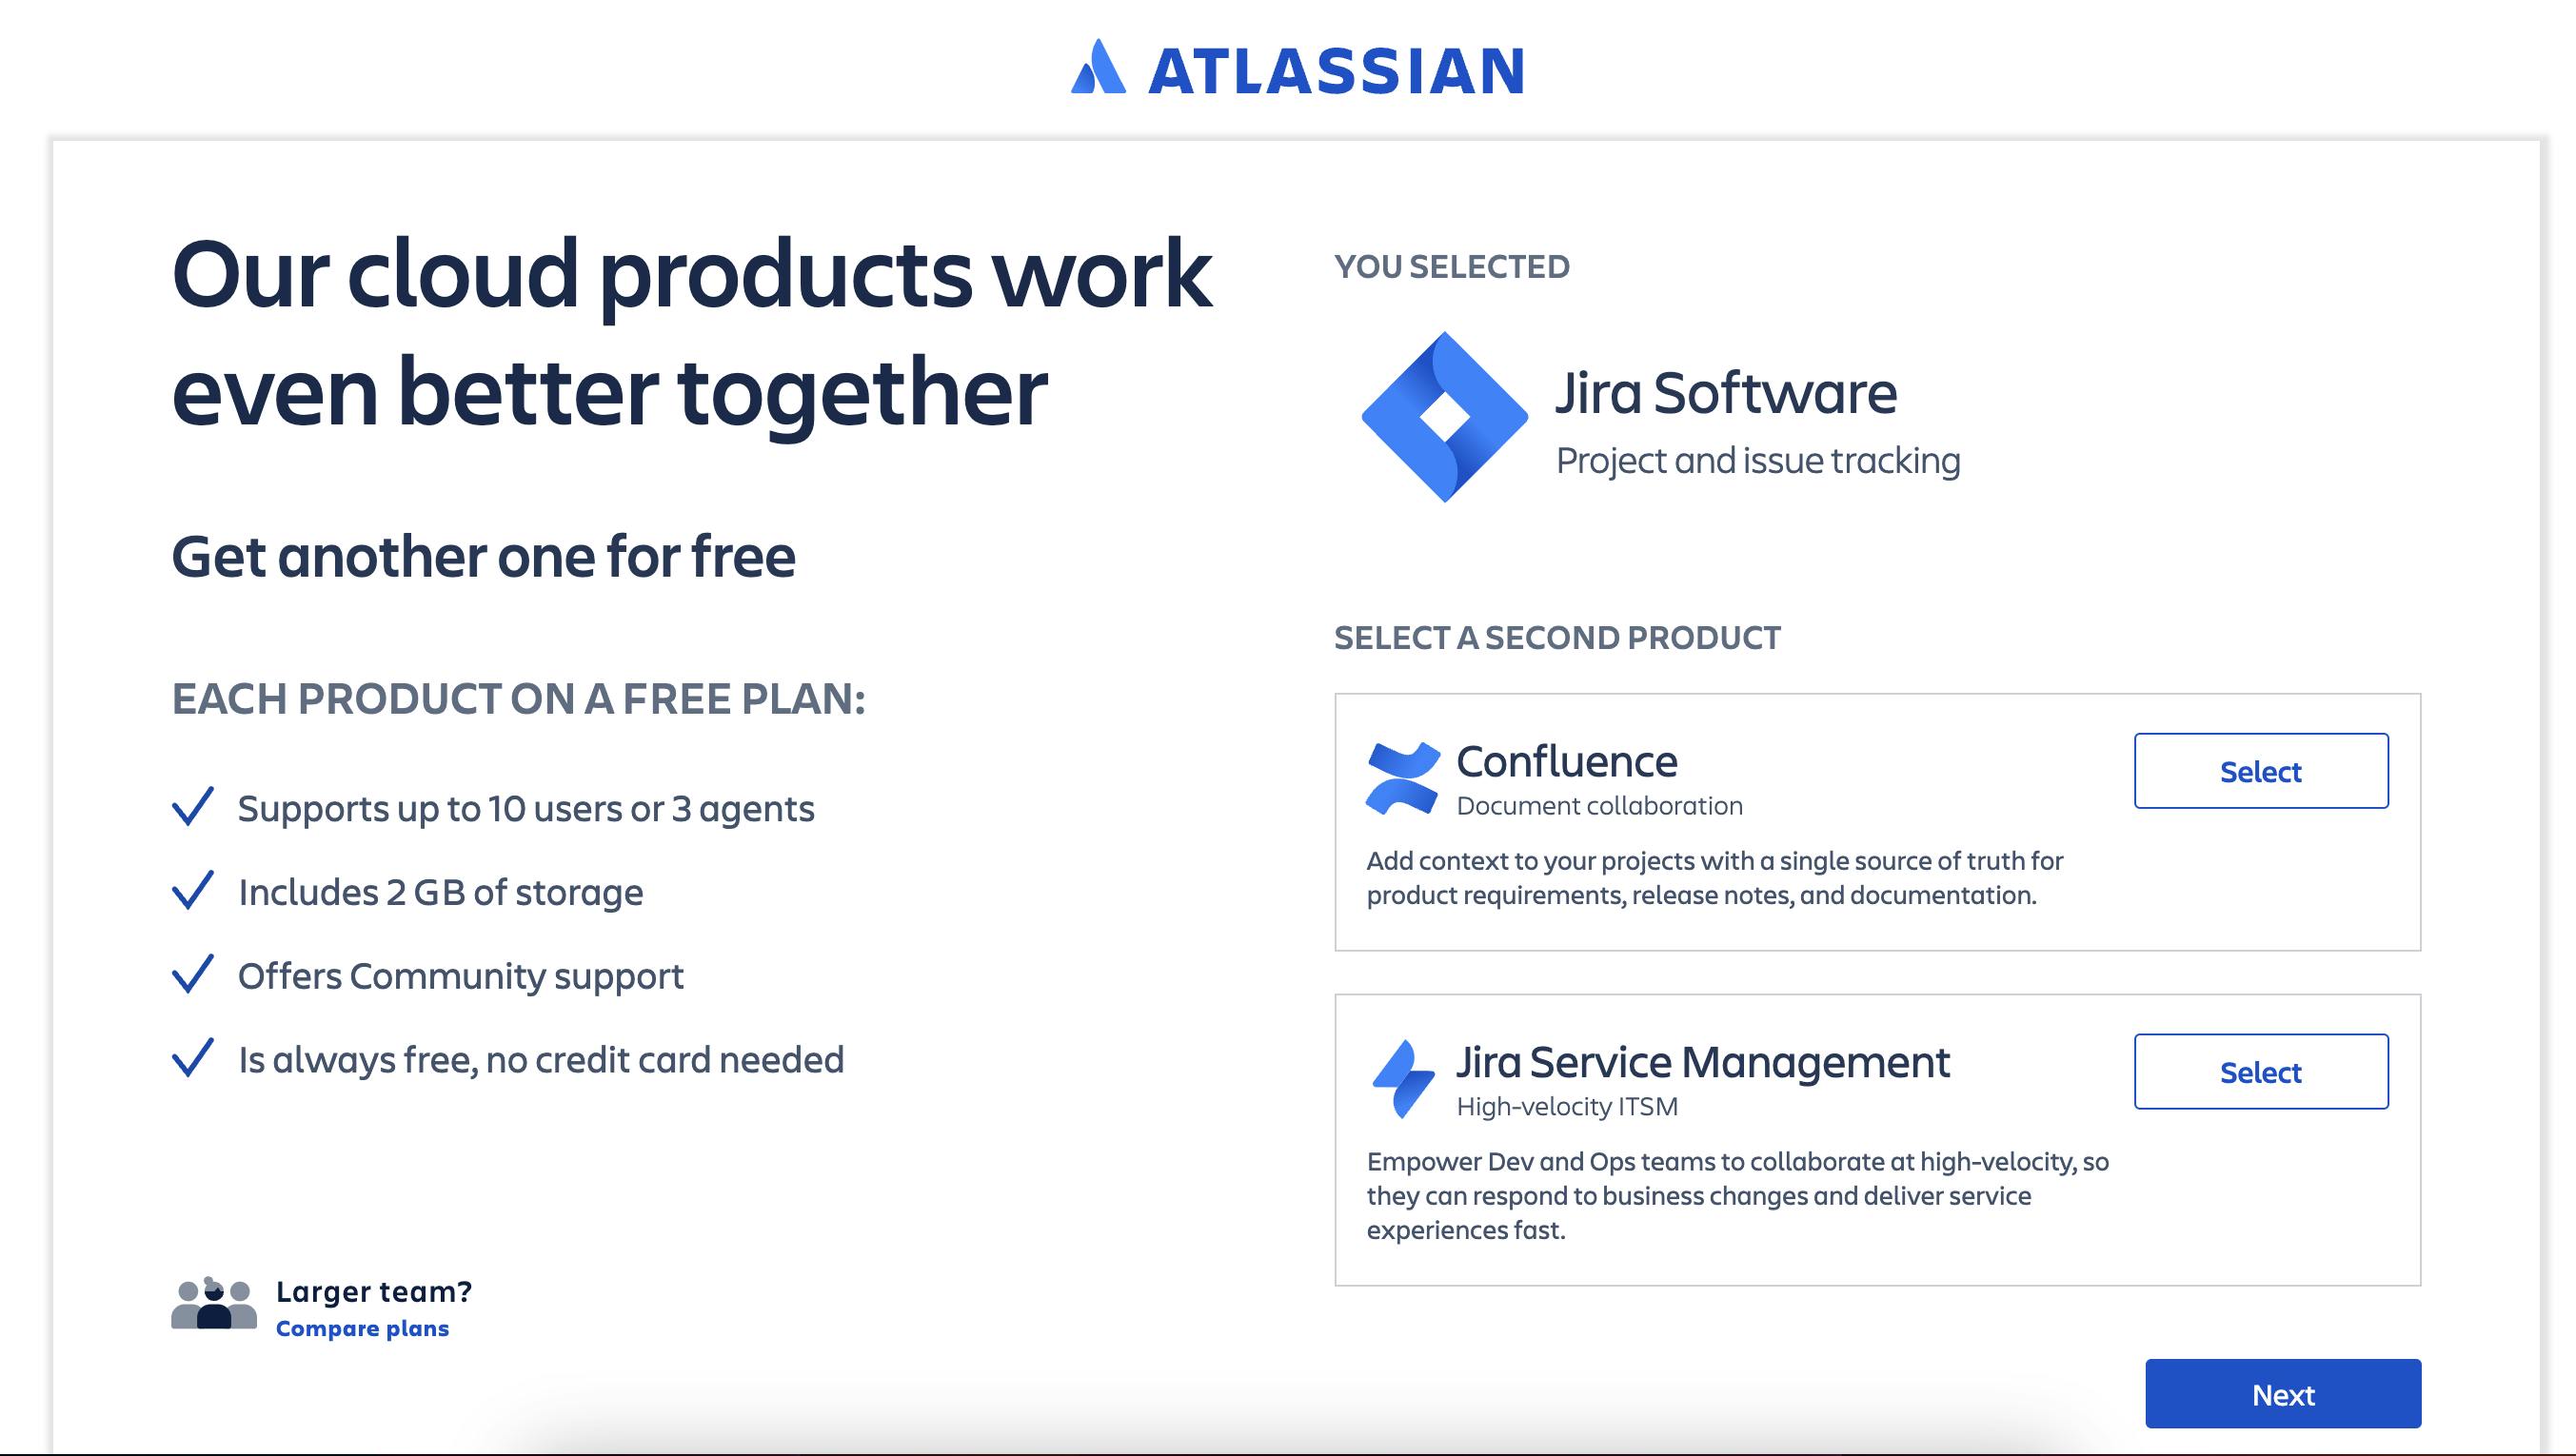
Click next to continue
Select a method to create an account, since I use Gsuite I'll Continue with Google.
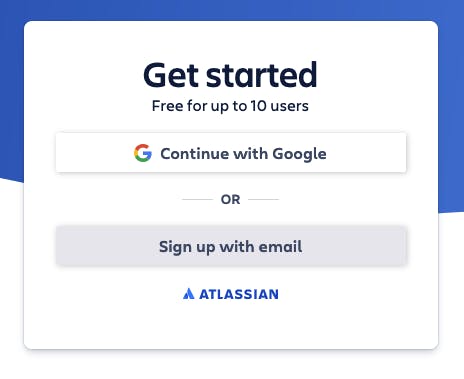
My email has been pre-selected after Signing into my Google account, next give your site an address and press Agree to continue.
Onboarding
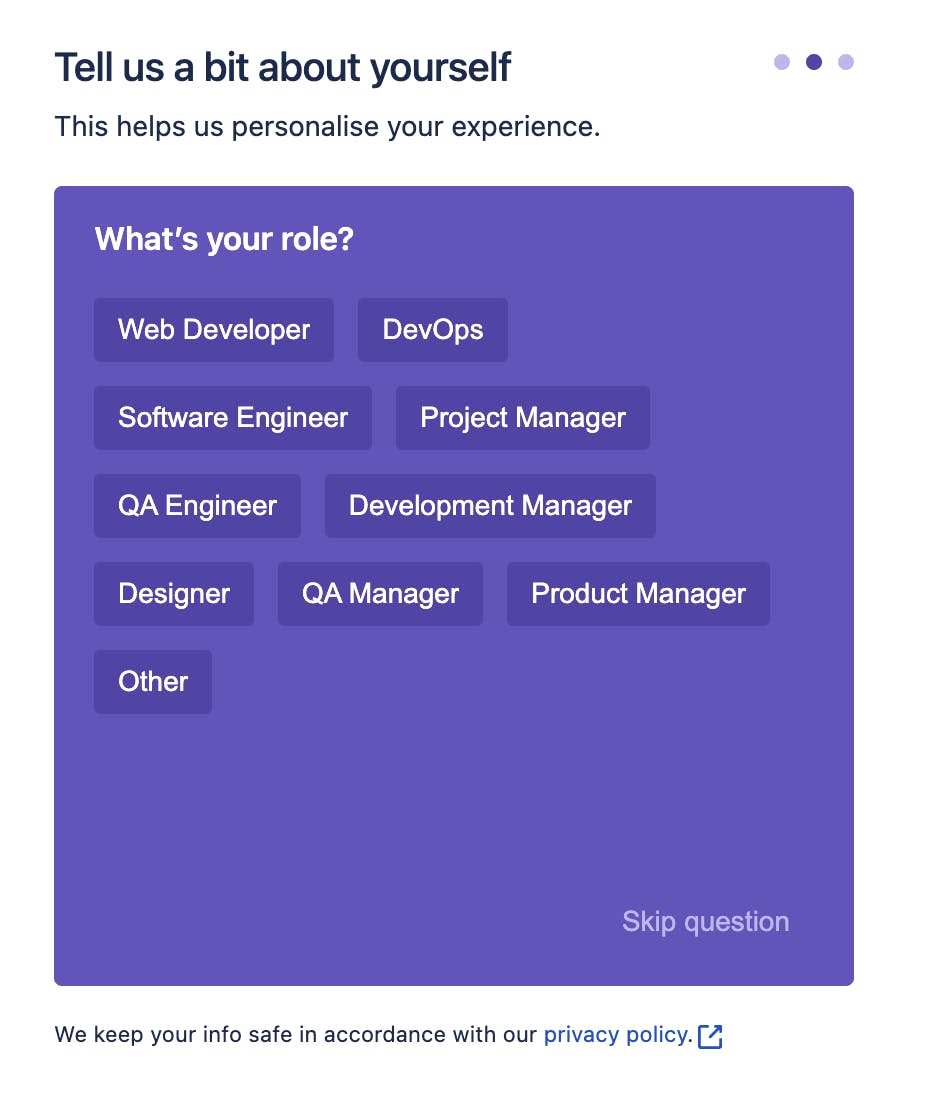
The first page asks for information about you, I'll select Software Development.

Then Web Developer
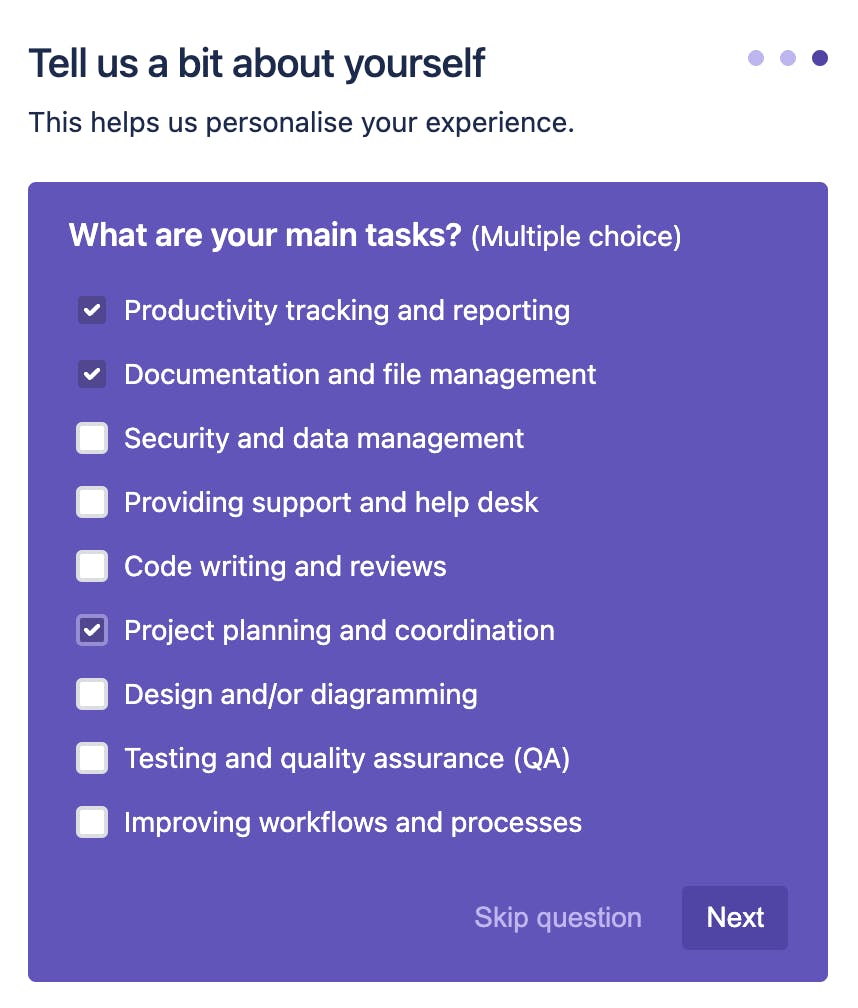
The last page is a multiple-choice page, this is skippable.
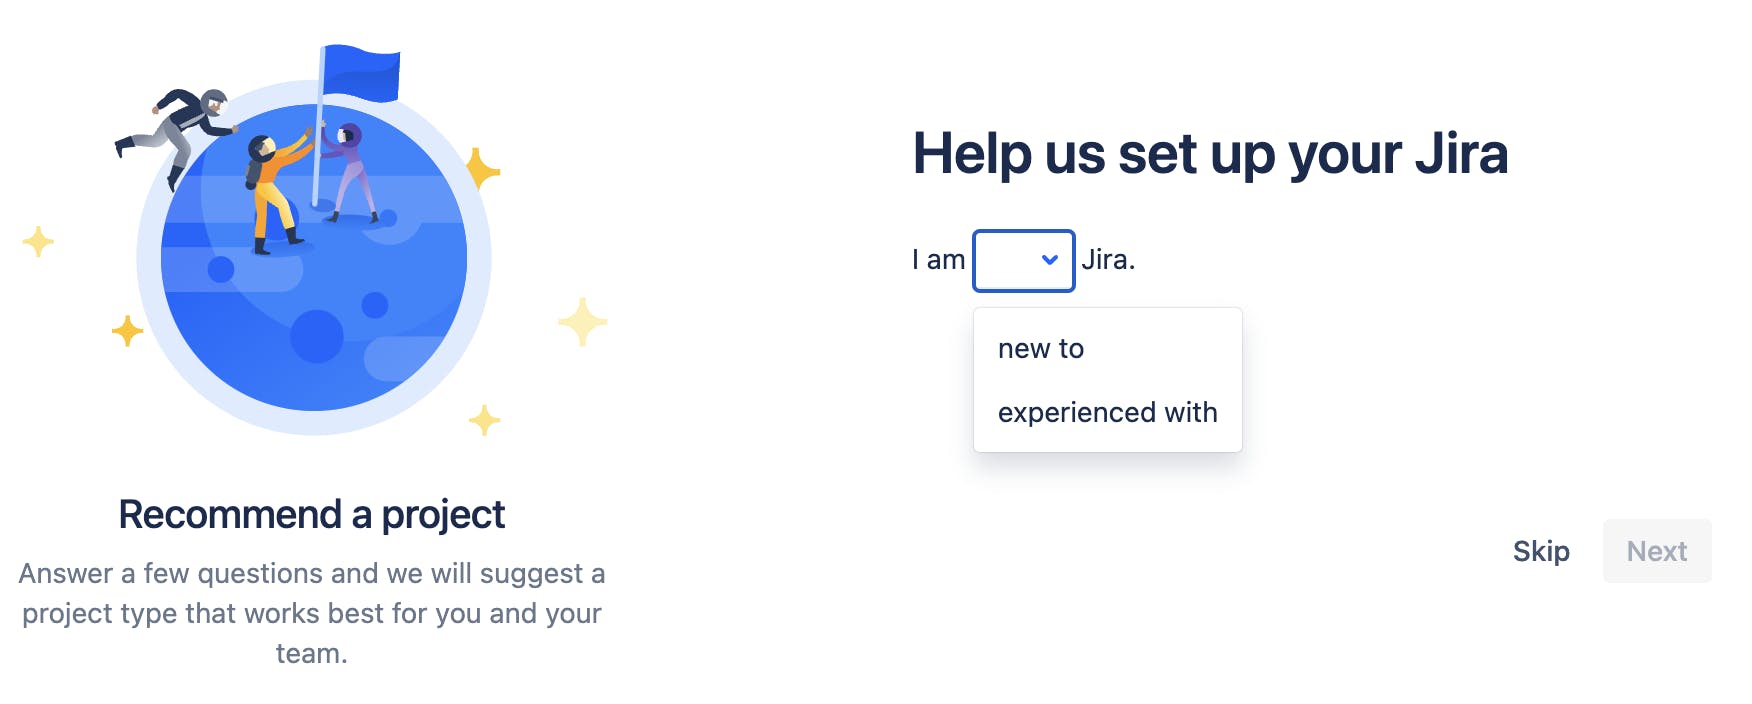
This next page is also skippable, I skipped it.
Creating your first project
From this page give your first project a name, clicking on more options allows you to select a project type. The options are Team-managed and Company-managed
I wont be using Team-managed projects in this post.
Since I know I'm going to be setting up multiple projects and having one project act as a hub to feed all issues from other projects I will select company-managed only admins can setup company-managed this project type allows for issues to be shared across projects.
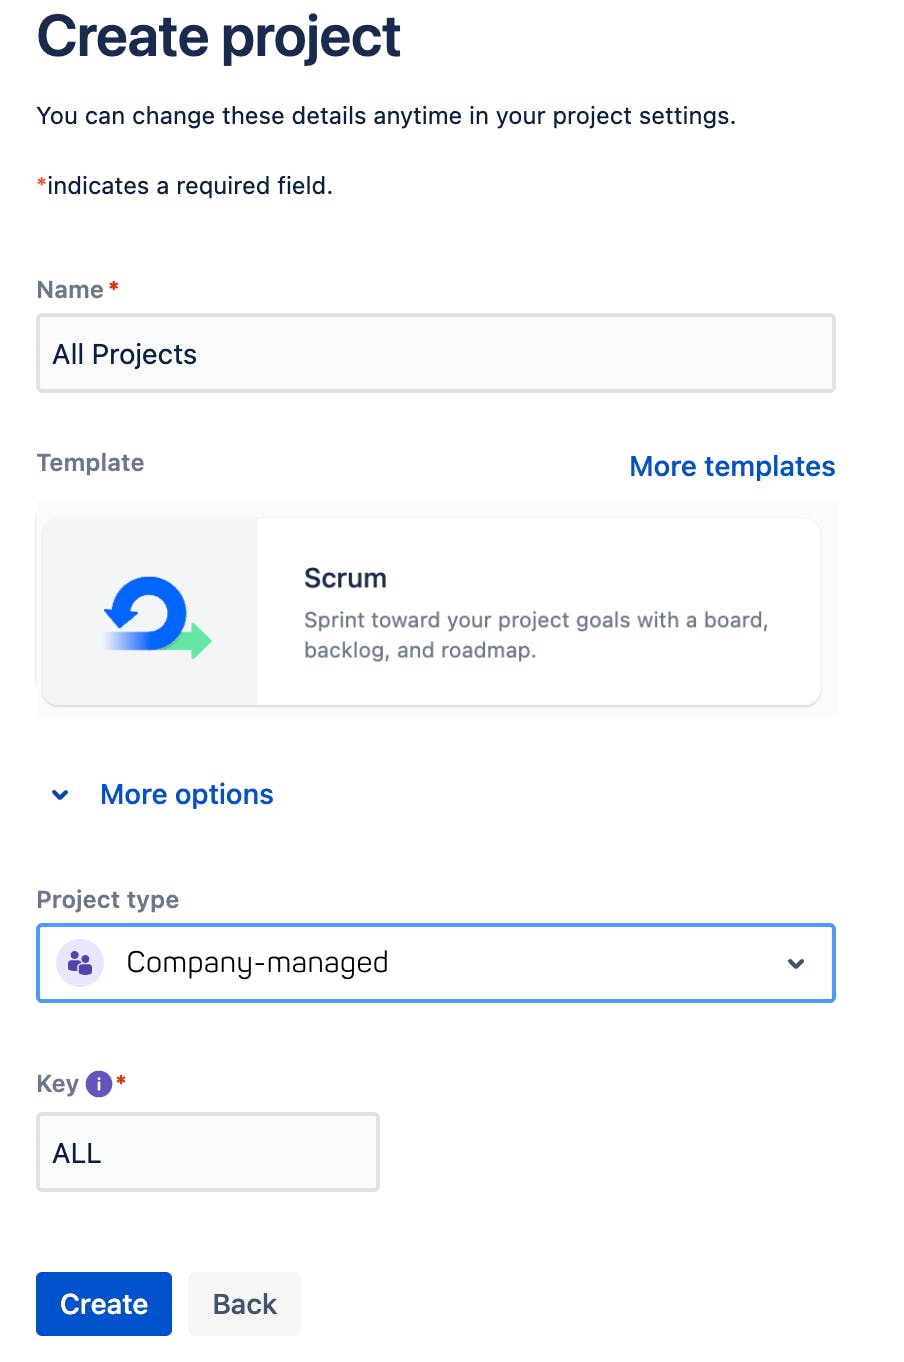
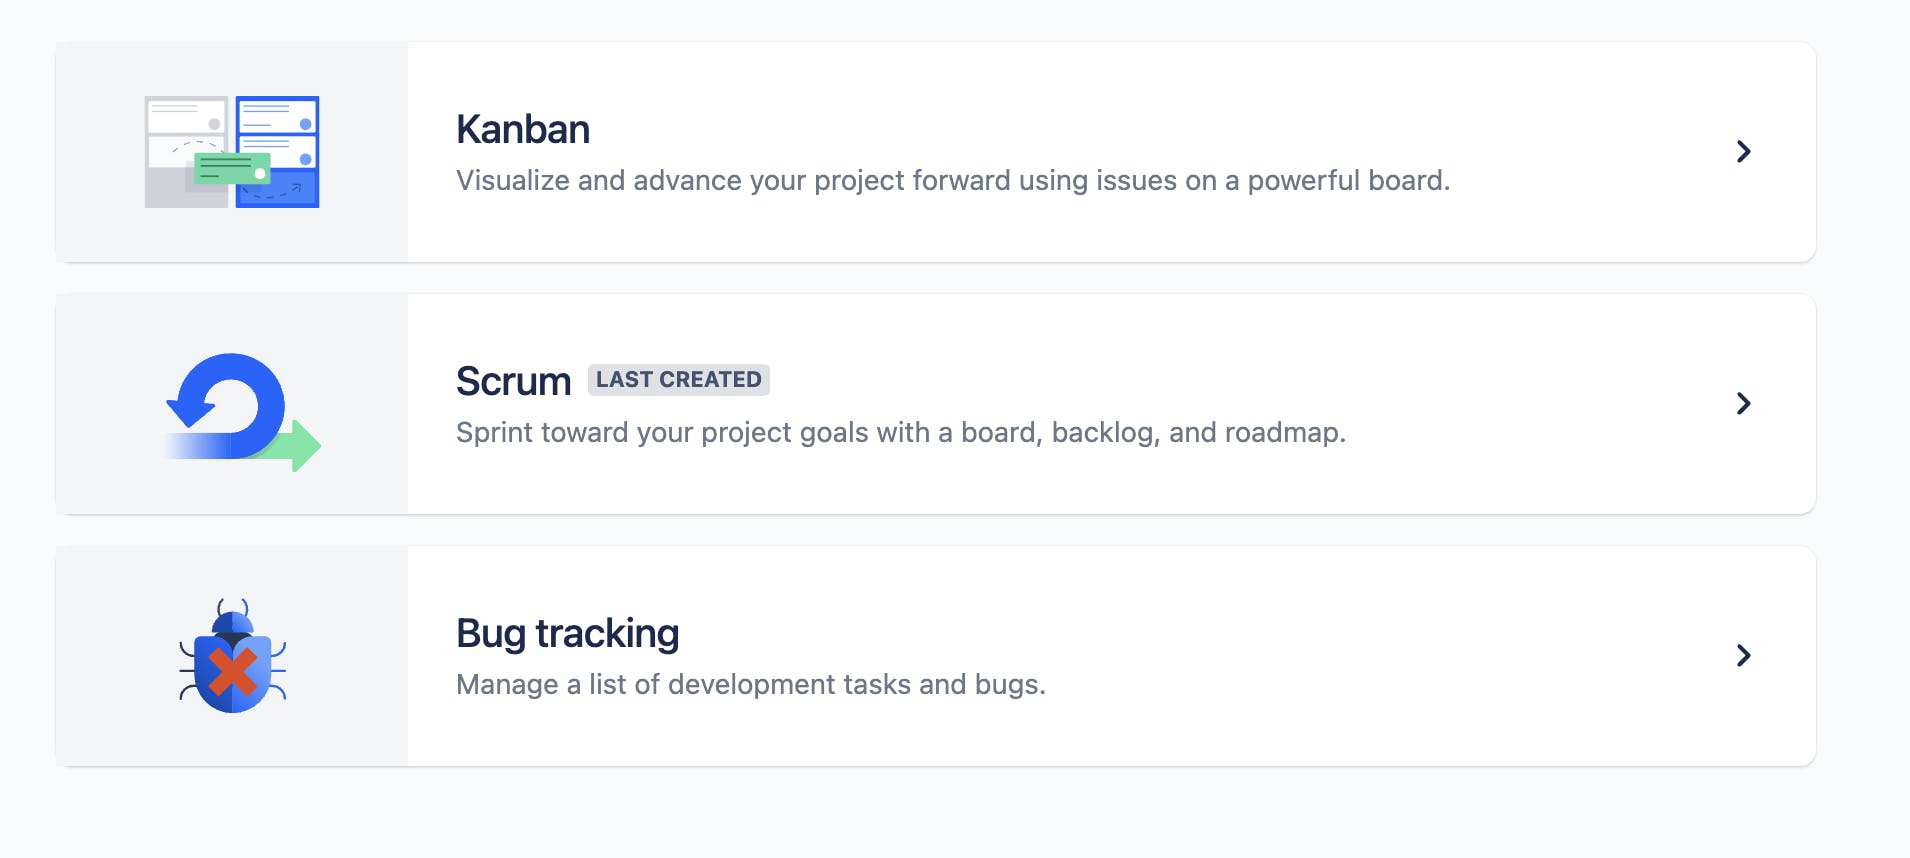
My first project will be called All Projects. I'll override the key from AP to ALL I don't want to use a Kanban board so I'll click more templates.
Select Scrum.
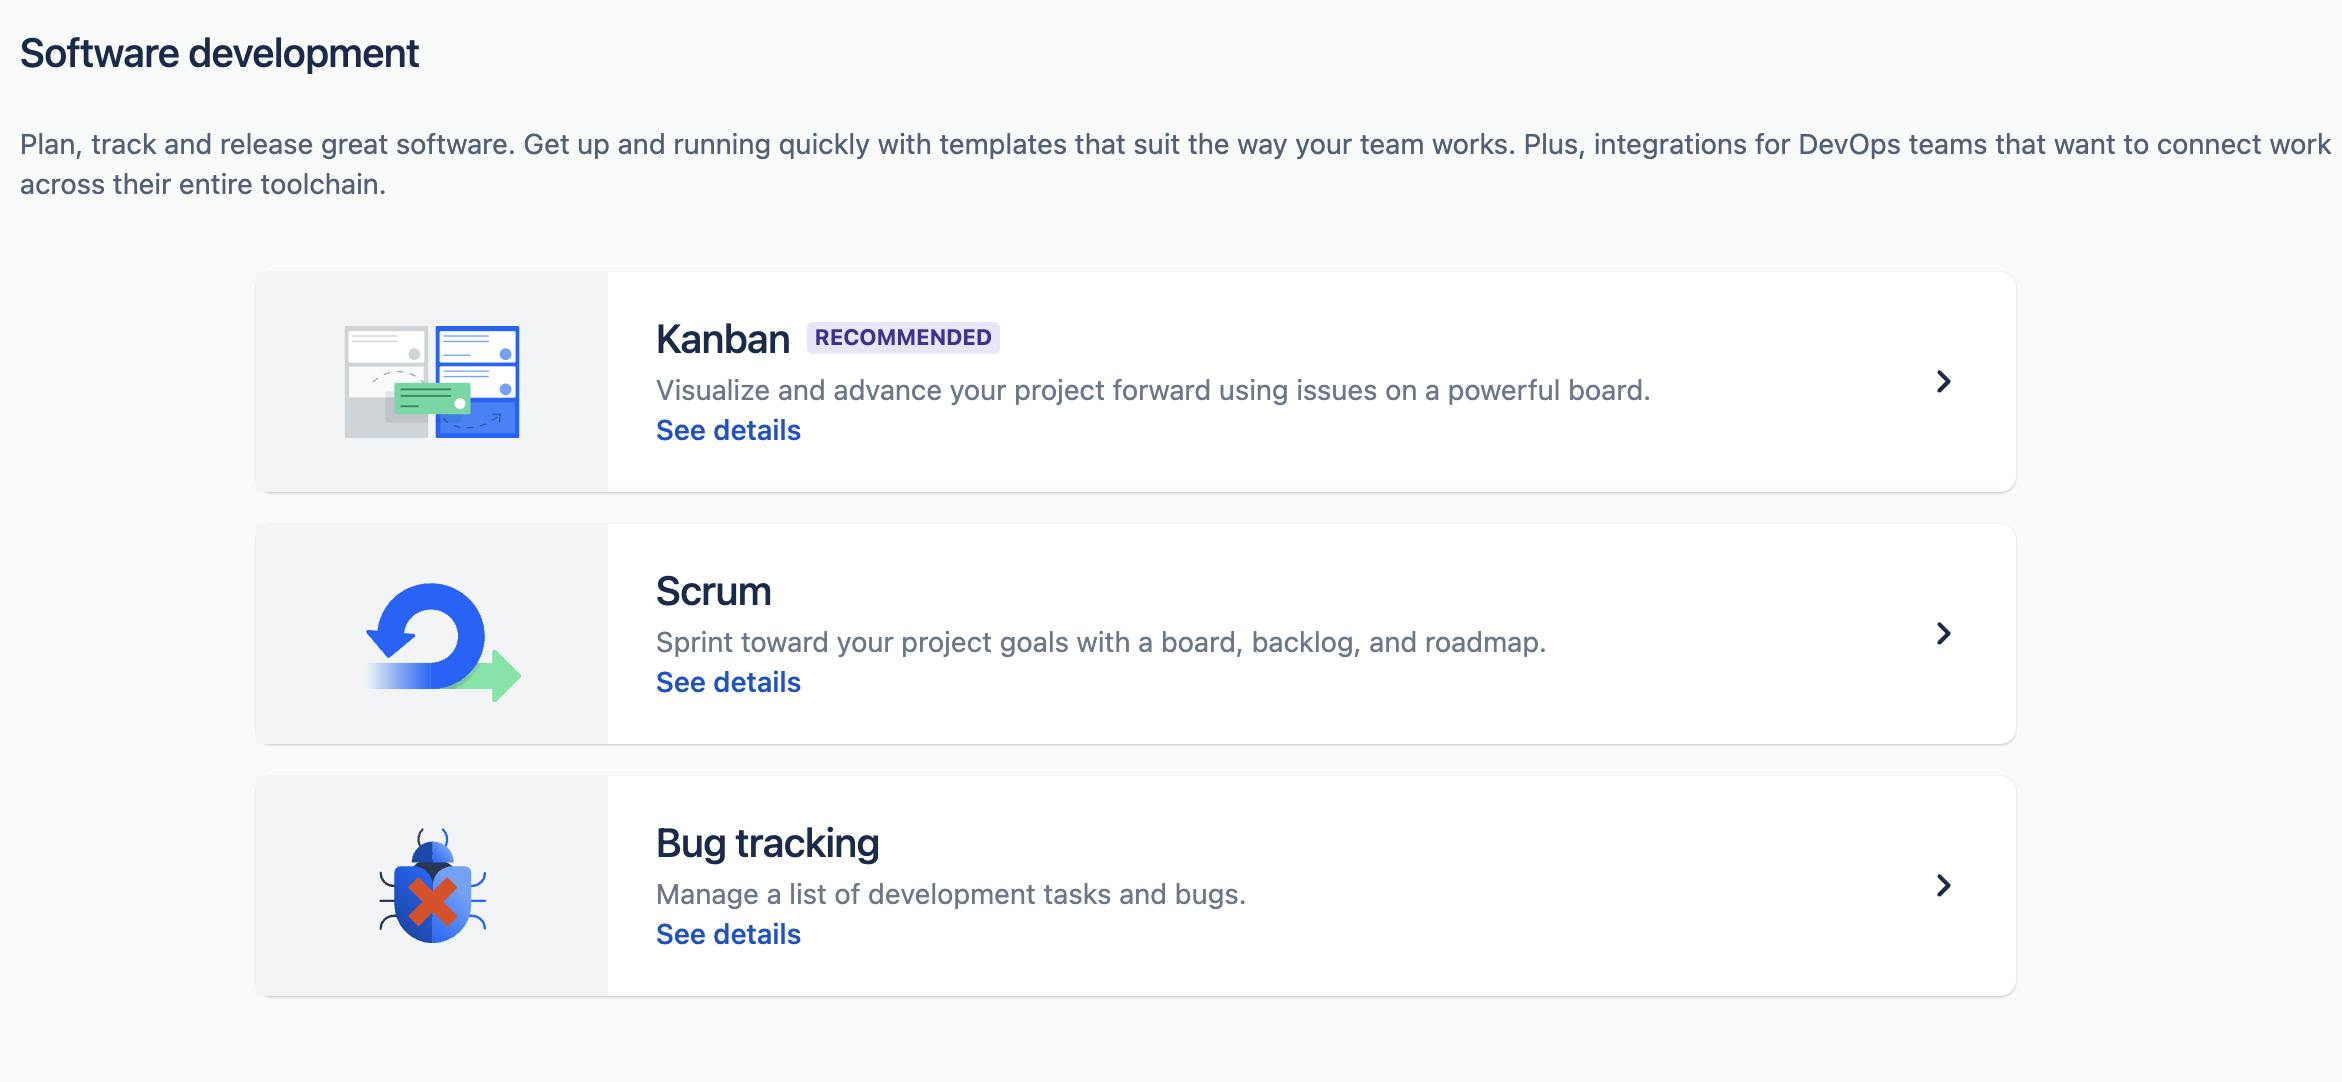
Now you will be back on the previous screen but with the Scrum template selected.
Press Create to continue.
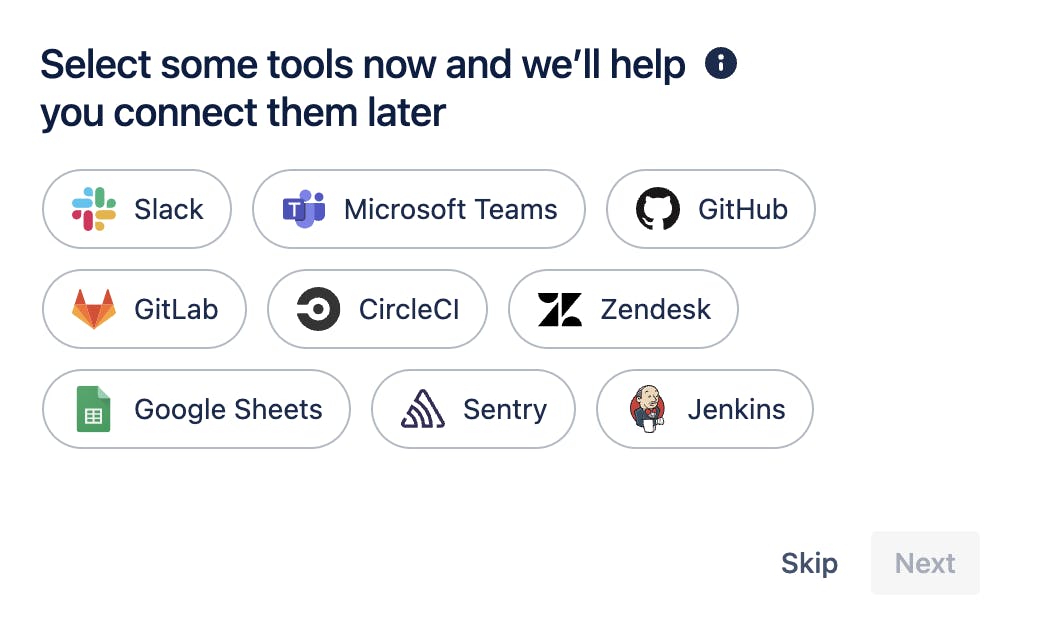
Select any services you want to use, I'll skip this.
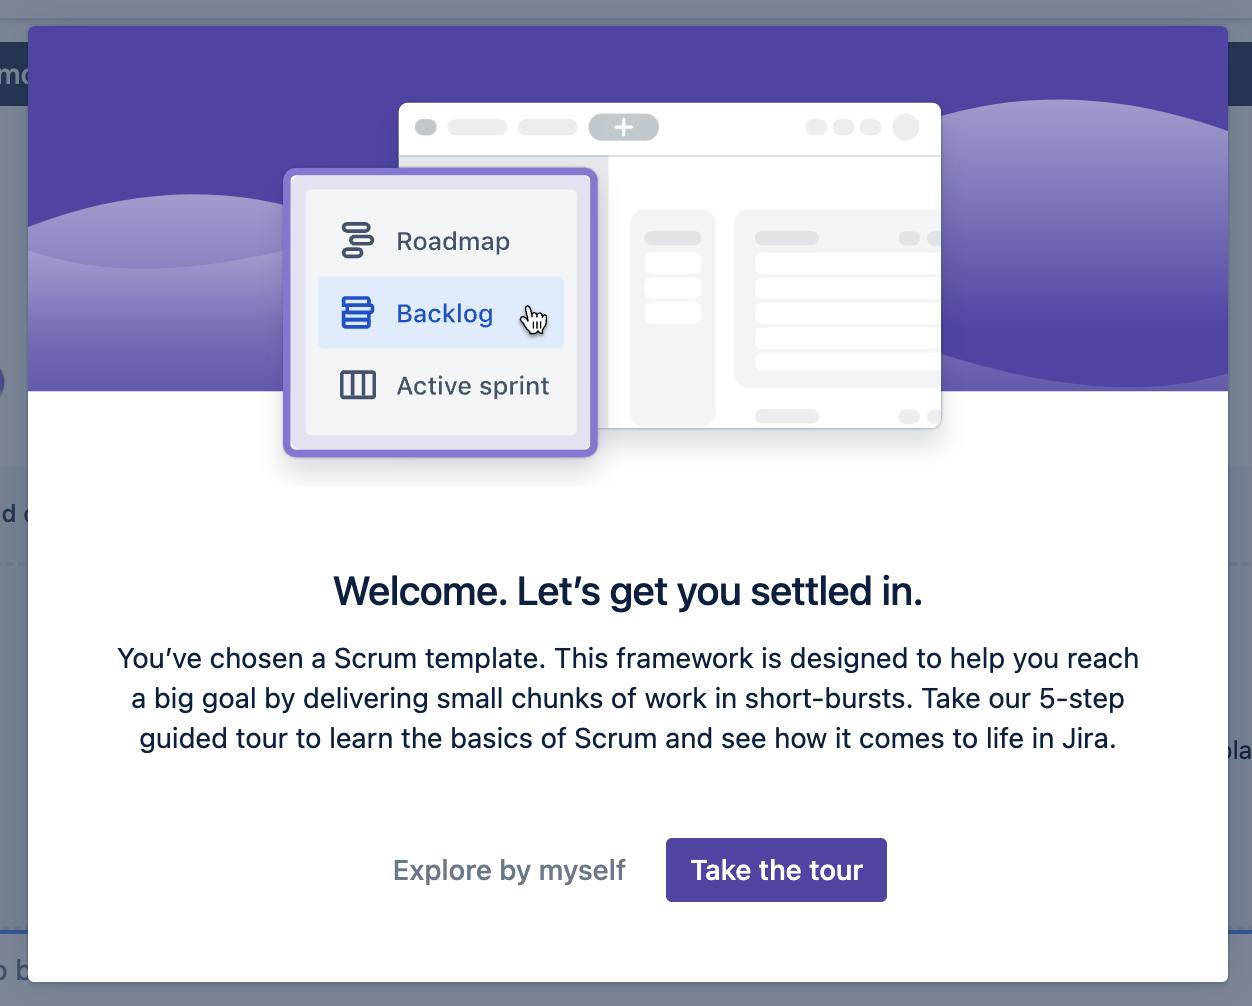
Now the main Jira application will be displayed, and a popup asking you want a tour, I recommend taking the tour. I'll skip it.
Setting up the next project
In order to pull in the issues from other projects, I'll first need to create another project.
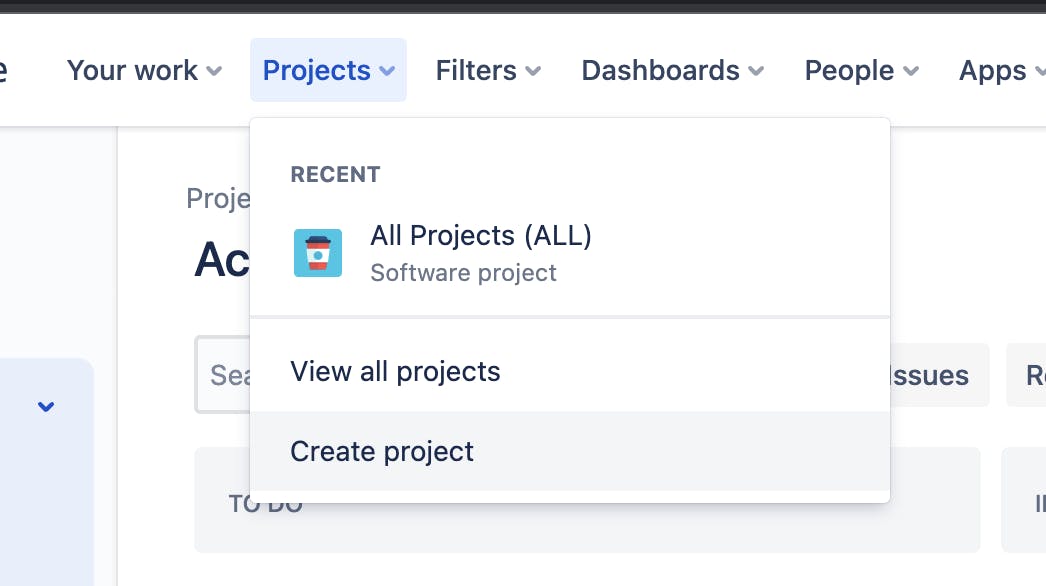
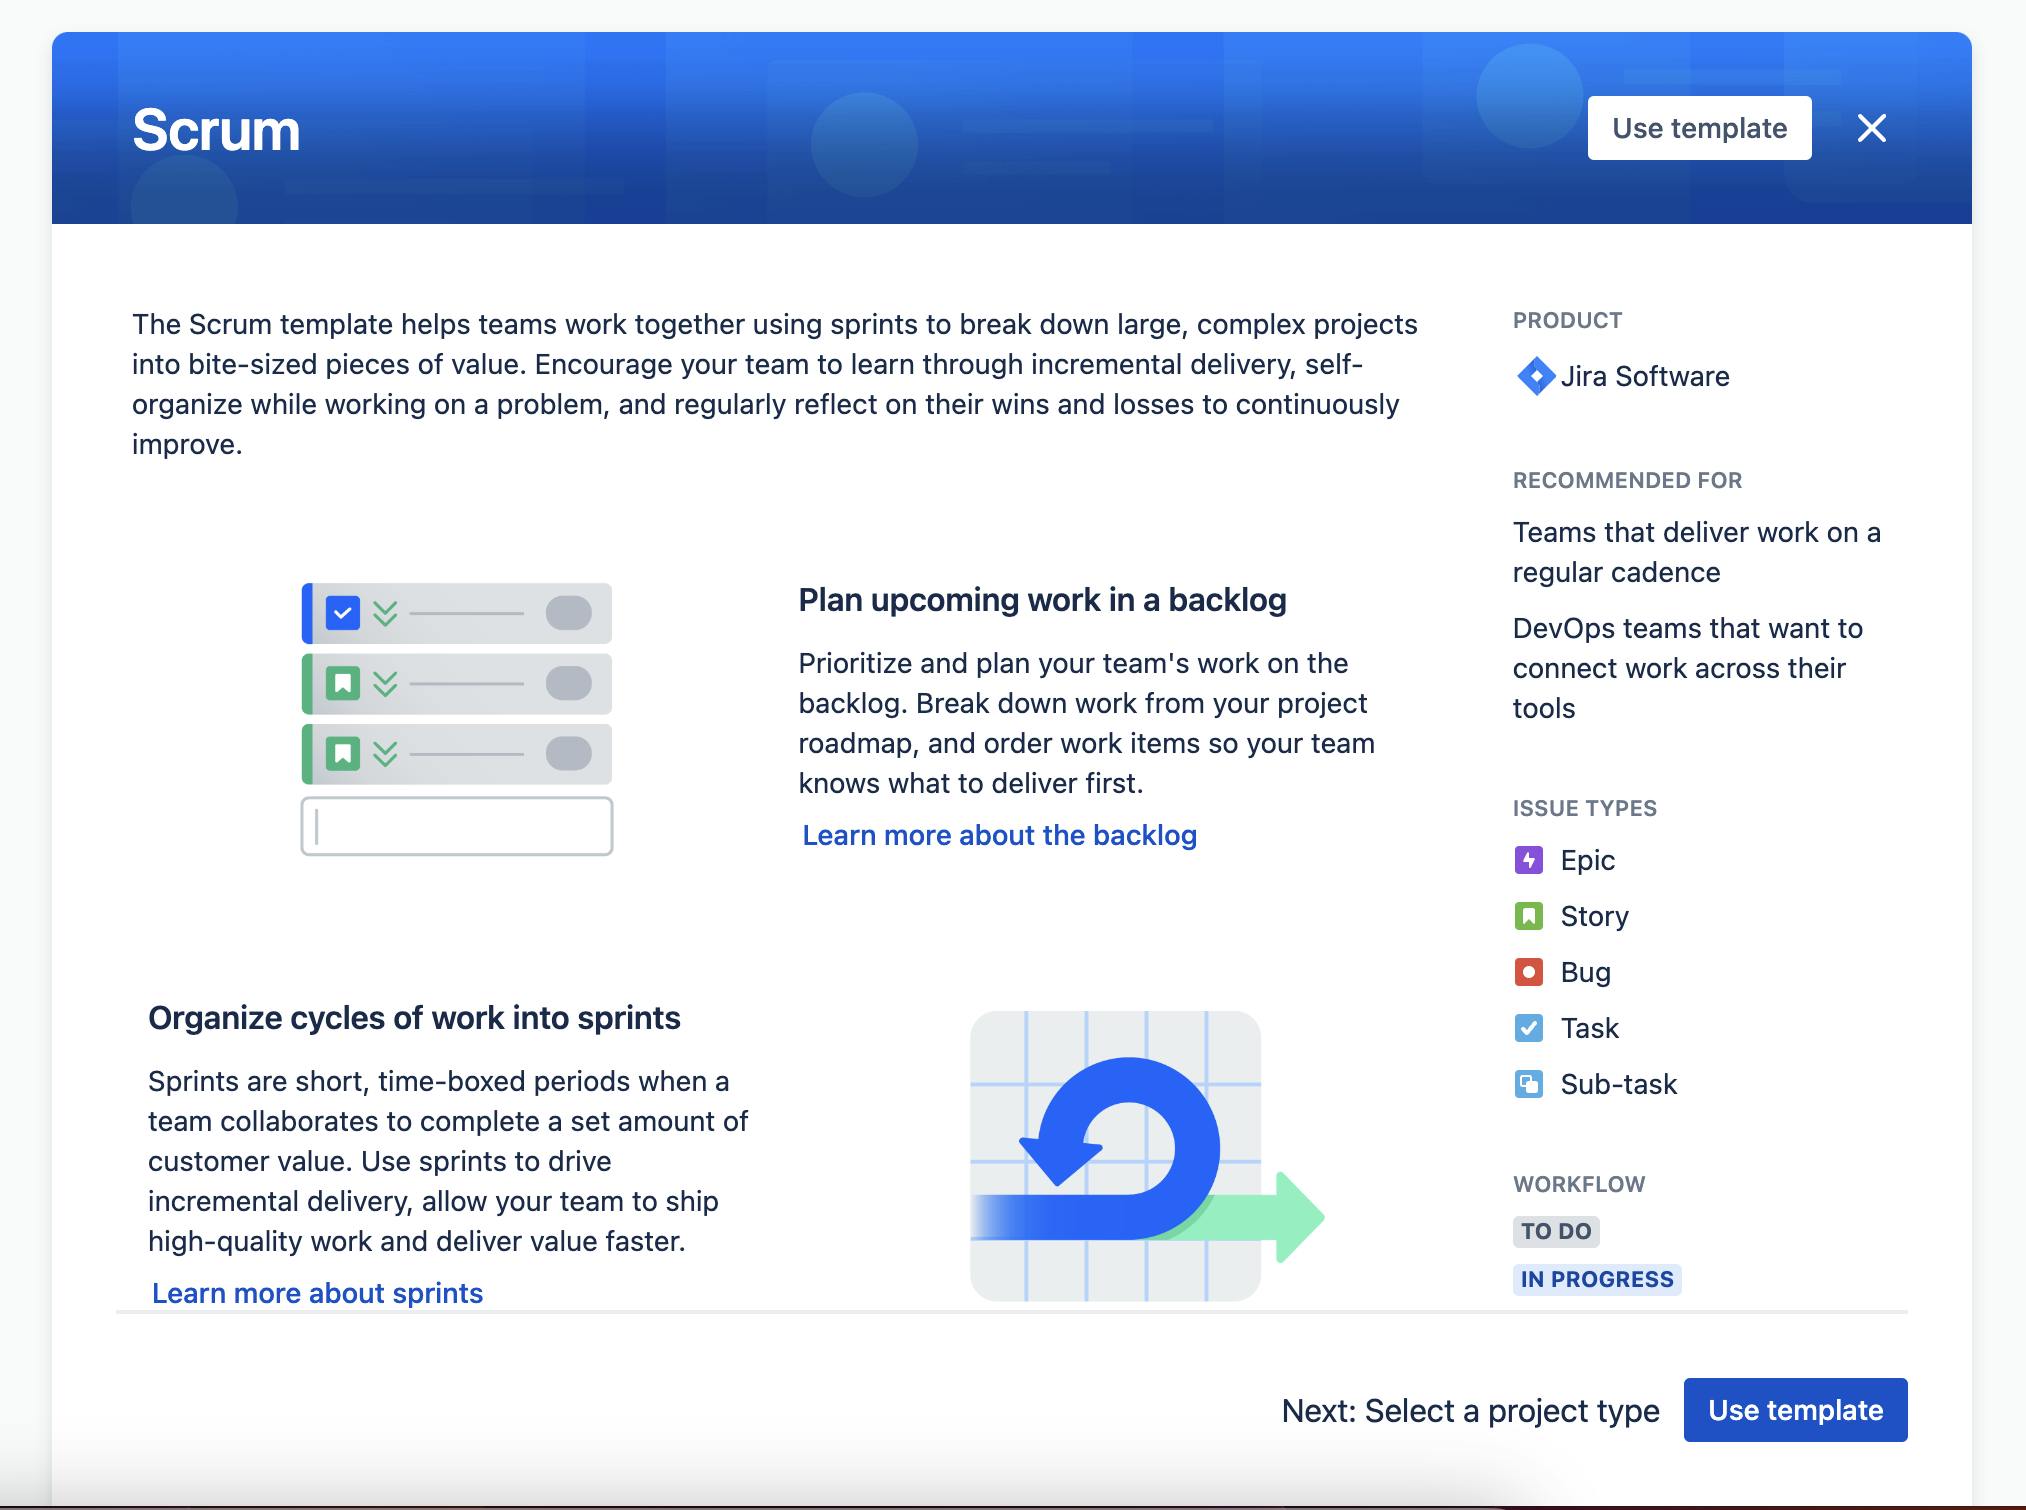
Click Projects then Create Project select the Scrum template
You will then see information about the template, click Use template
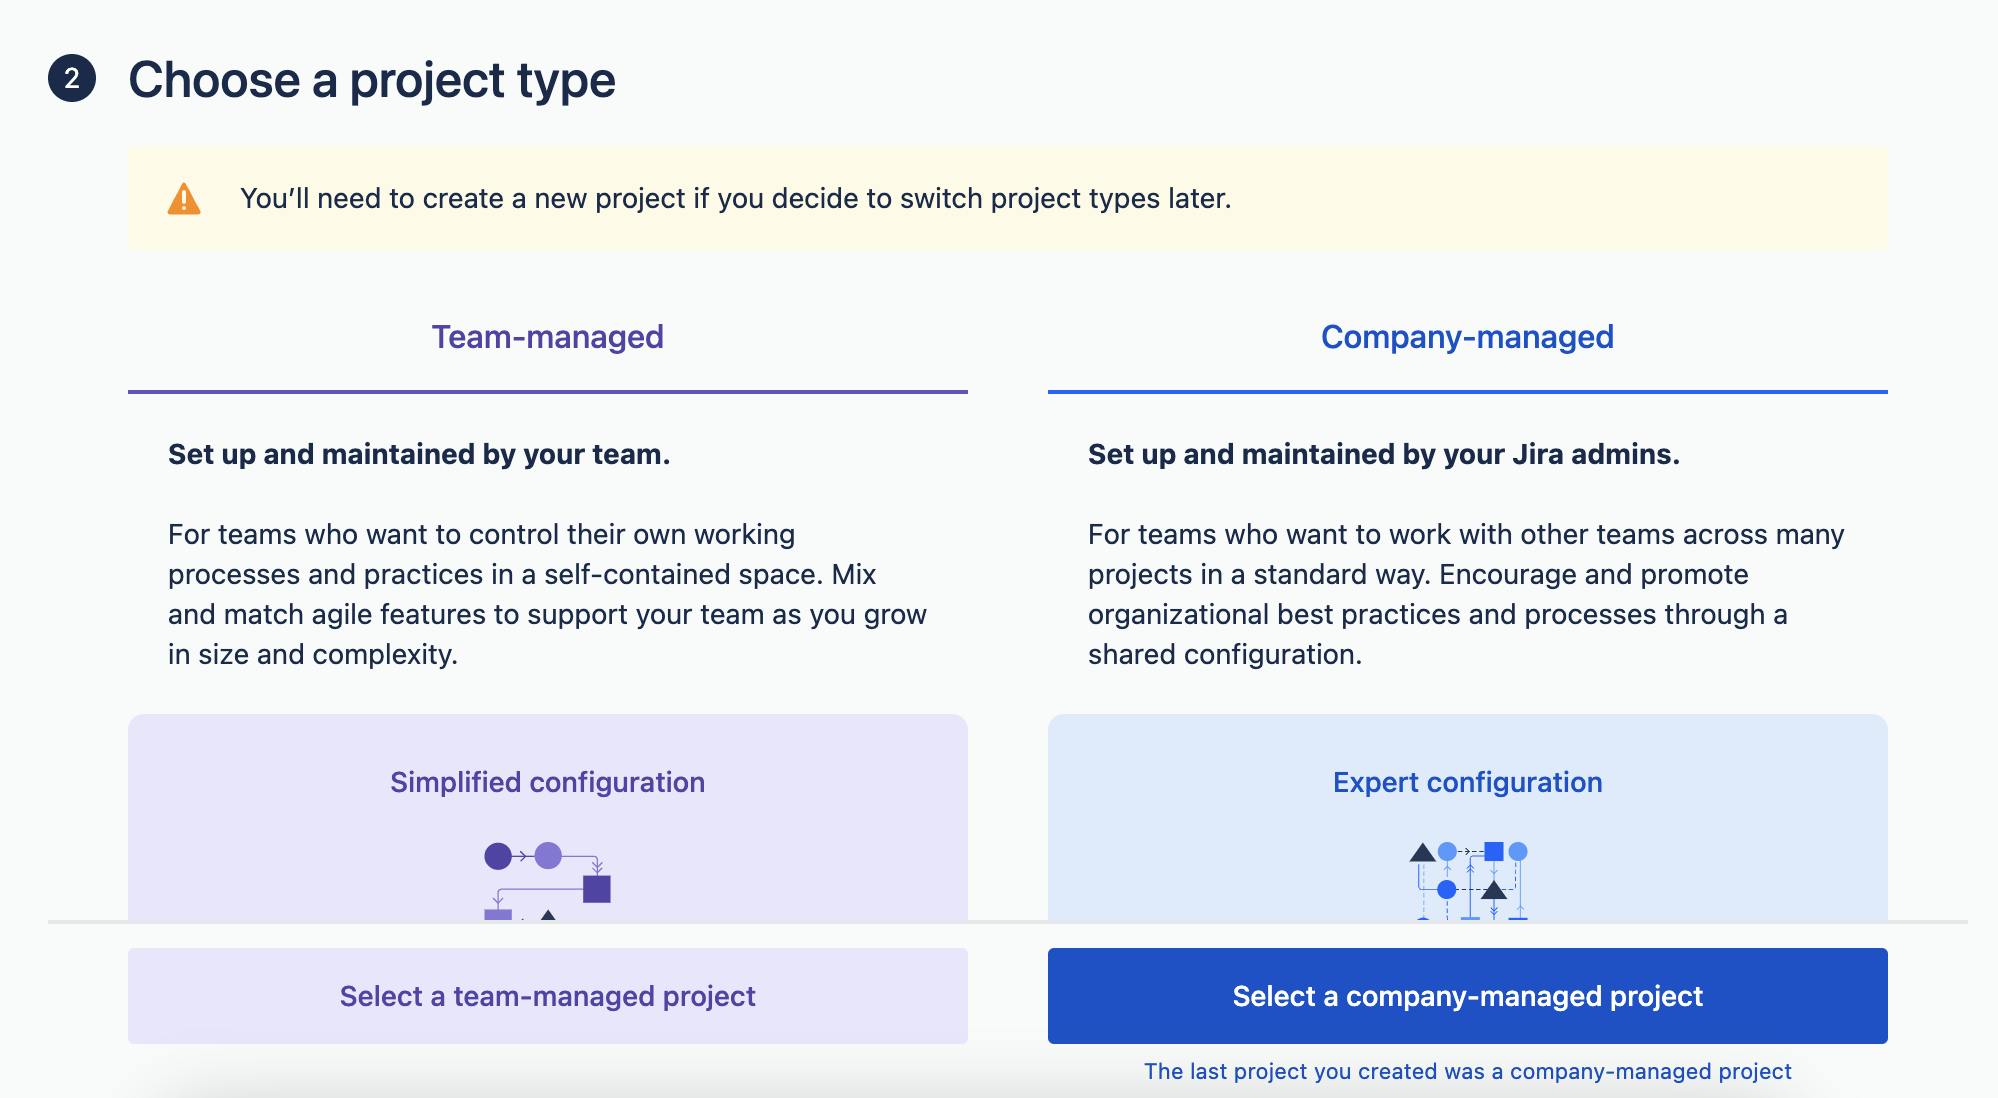
Next, select the project type, Select Company-managed
Now give the project a name, and the key will be filled in automatically. You can check the box to have repositories, and documents linked to the project.
You can link reposotories and documents in later if desired

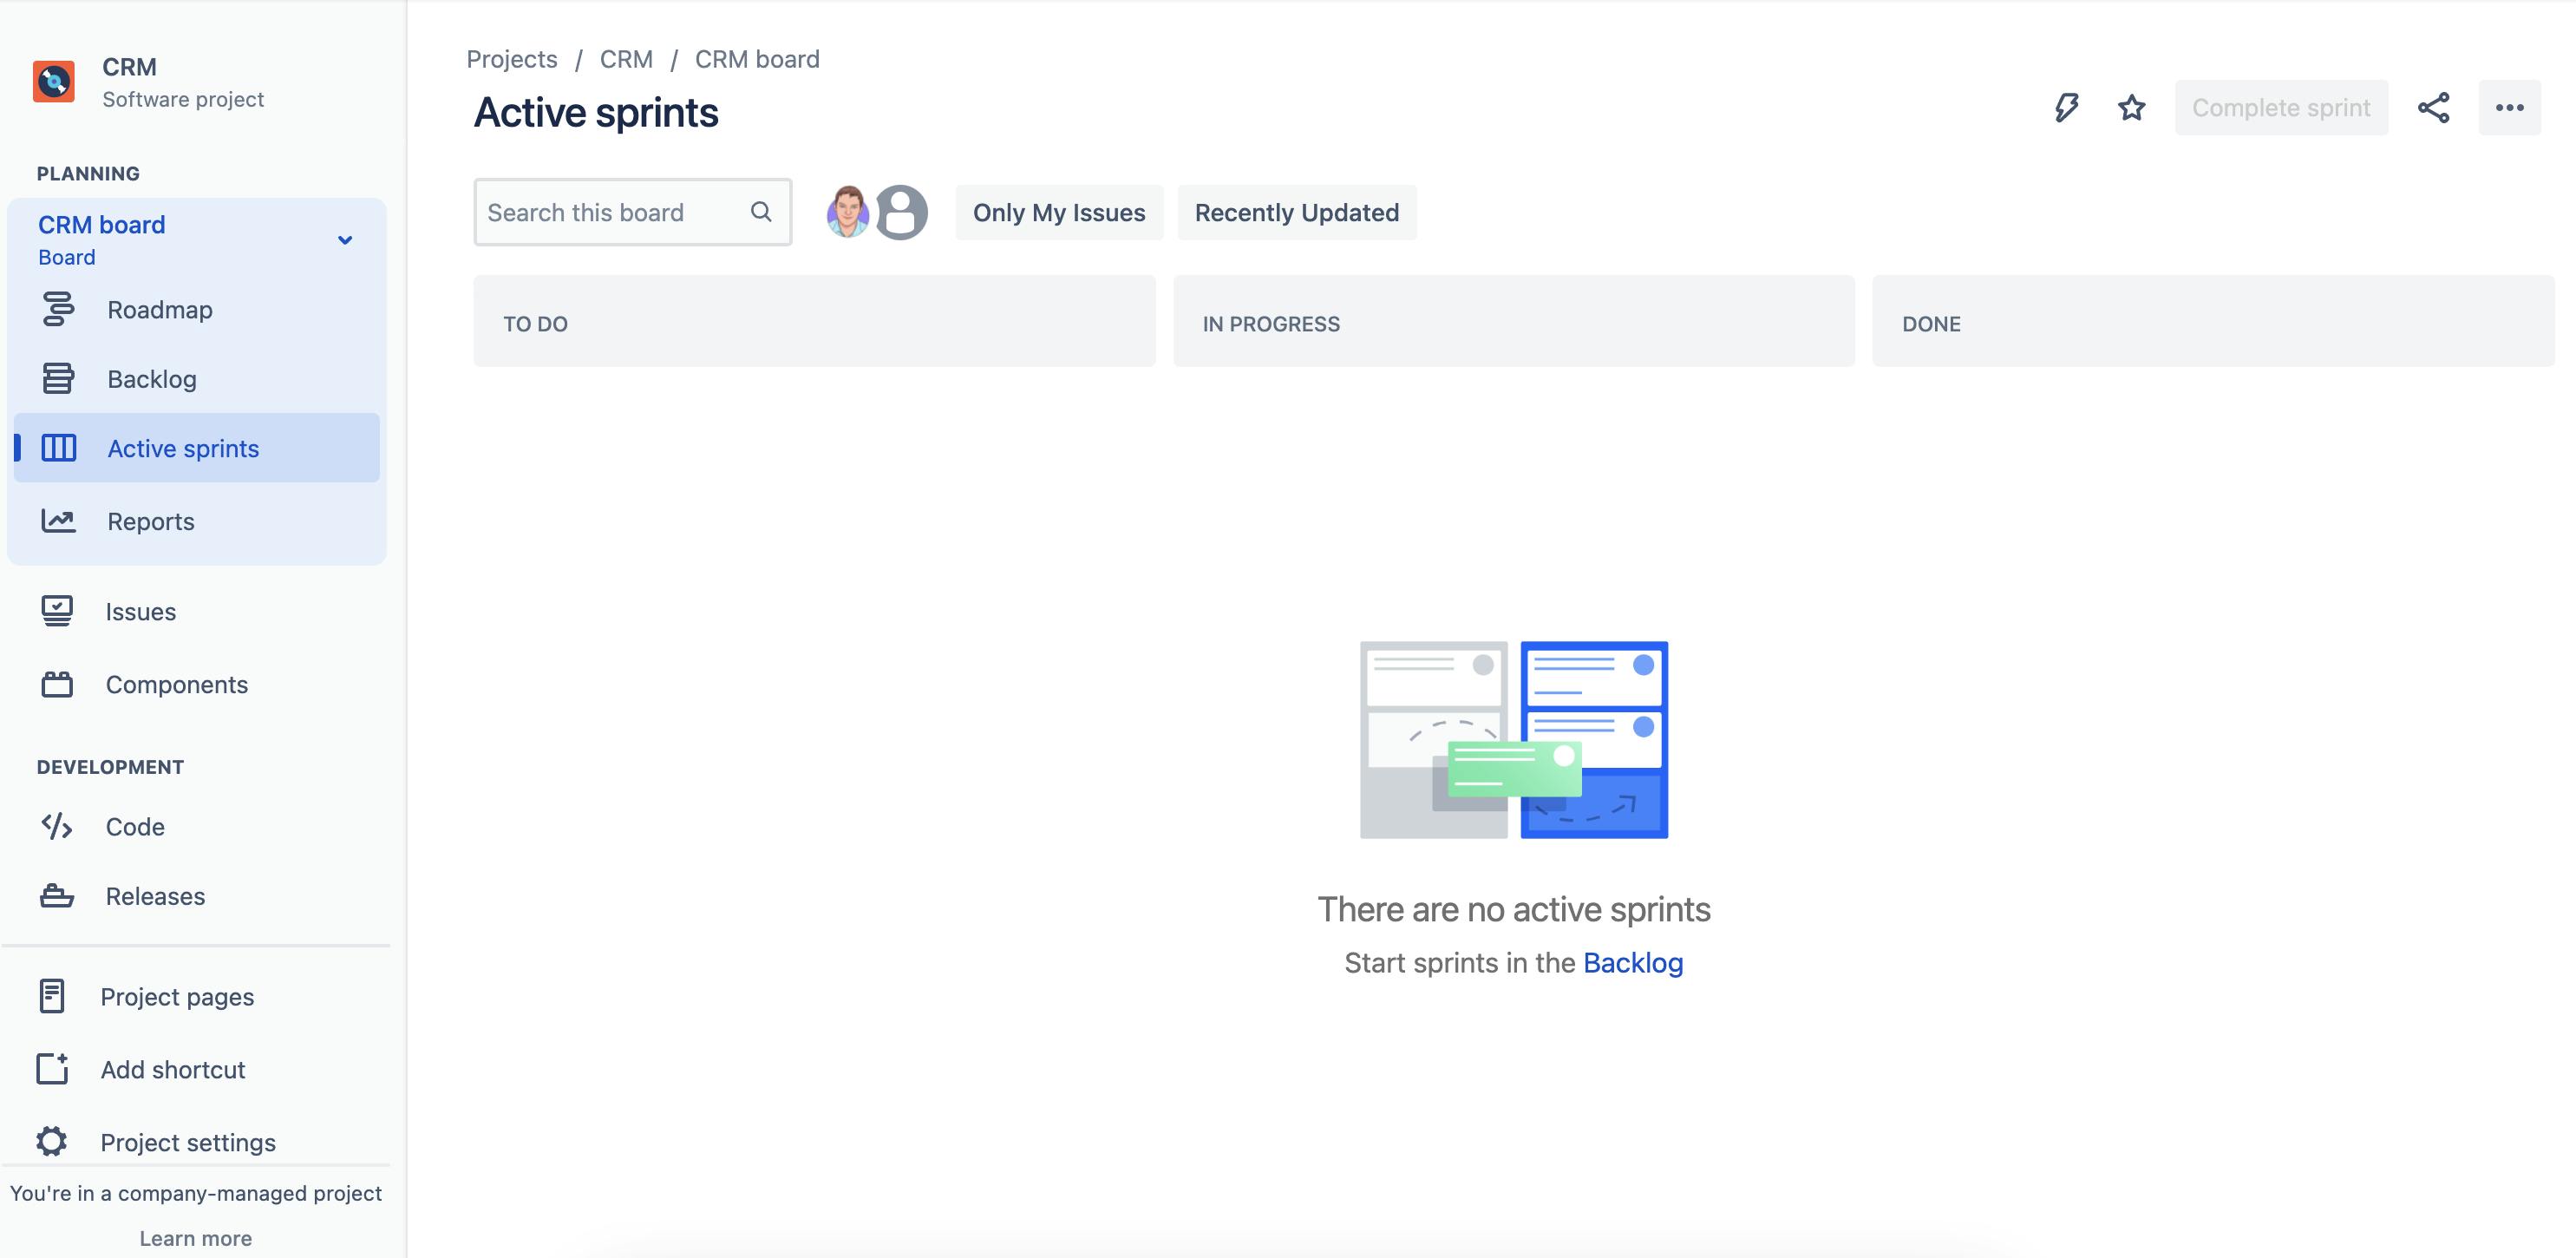
The new project is now set up, you will be taken to the project's active sprint. Since there is no sprint yet you'll need to go to the backlog.
The backlog is made up of your issues, sprints, versions and epics.
Before I go any further there's some terminology that needs to be covered.
Stories are a type of issue think of an issue as the task to add value to the project.
EPIC is a container for multiple stories. An epic is really a large story that won't be able to be completed in a single sprint. So multiple stories are assigned that can be worked on in multiple sprints.
Versions allow you to specify issues into versions, you may be building all forms in version 1 and adding integrations in version 2. Versions allow you to also manage releases.
Components are used to specify sections/modules for example a component may be Courses or Users they are essentially a tag but also allow each component to have a lead assignee.
Labels are tags you can give an issue a label they can be used in filters and reporting
Creating issues
To create an issue click the Create button at the top of the menu

a model will then open, and from here you can set the project, when inside a project the project selection will be pre-filled.
The issue type there are 4 issue types:
Story is a task that adds value to the project
Task is a task that doesn't have to add value it can be for things like setting up a database, which doesn't directly add value.
I turn off tasks to avoid the confusion between them and stories
Bug is a task that you don't estimate as it's often an unknown cause
EPIC is a container for housing multiple issues
Stories and Bugs have different fields by default.
Configure Issue Types
If you want to remove any of the default issue types here are the steps. From within a project click on Project Settings in the bottom left sidebar.
Next click on Issues and Types
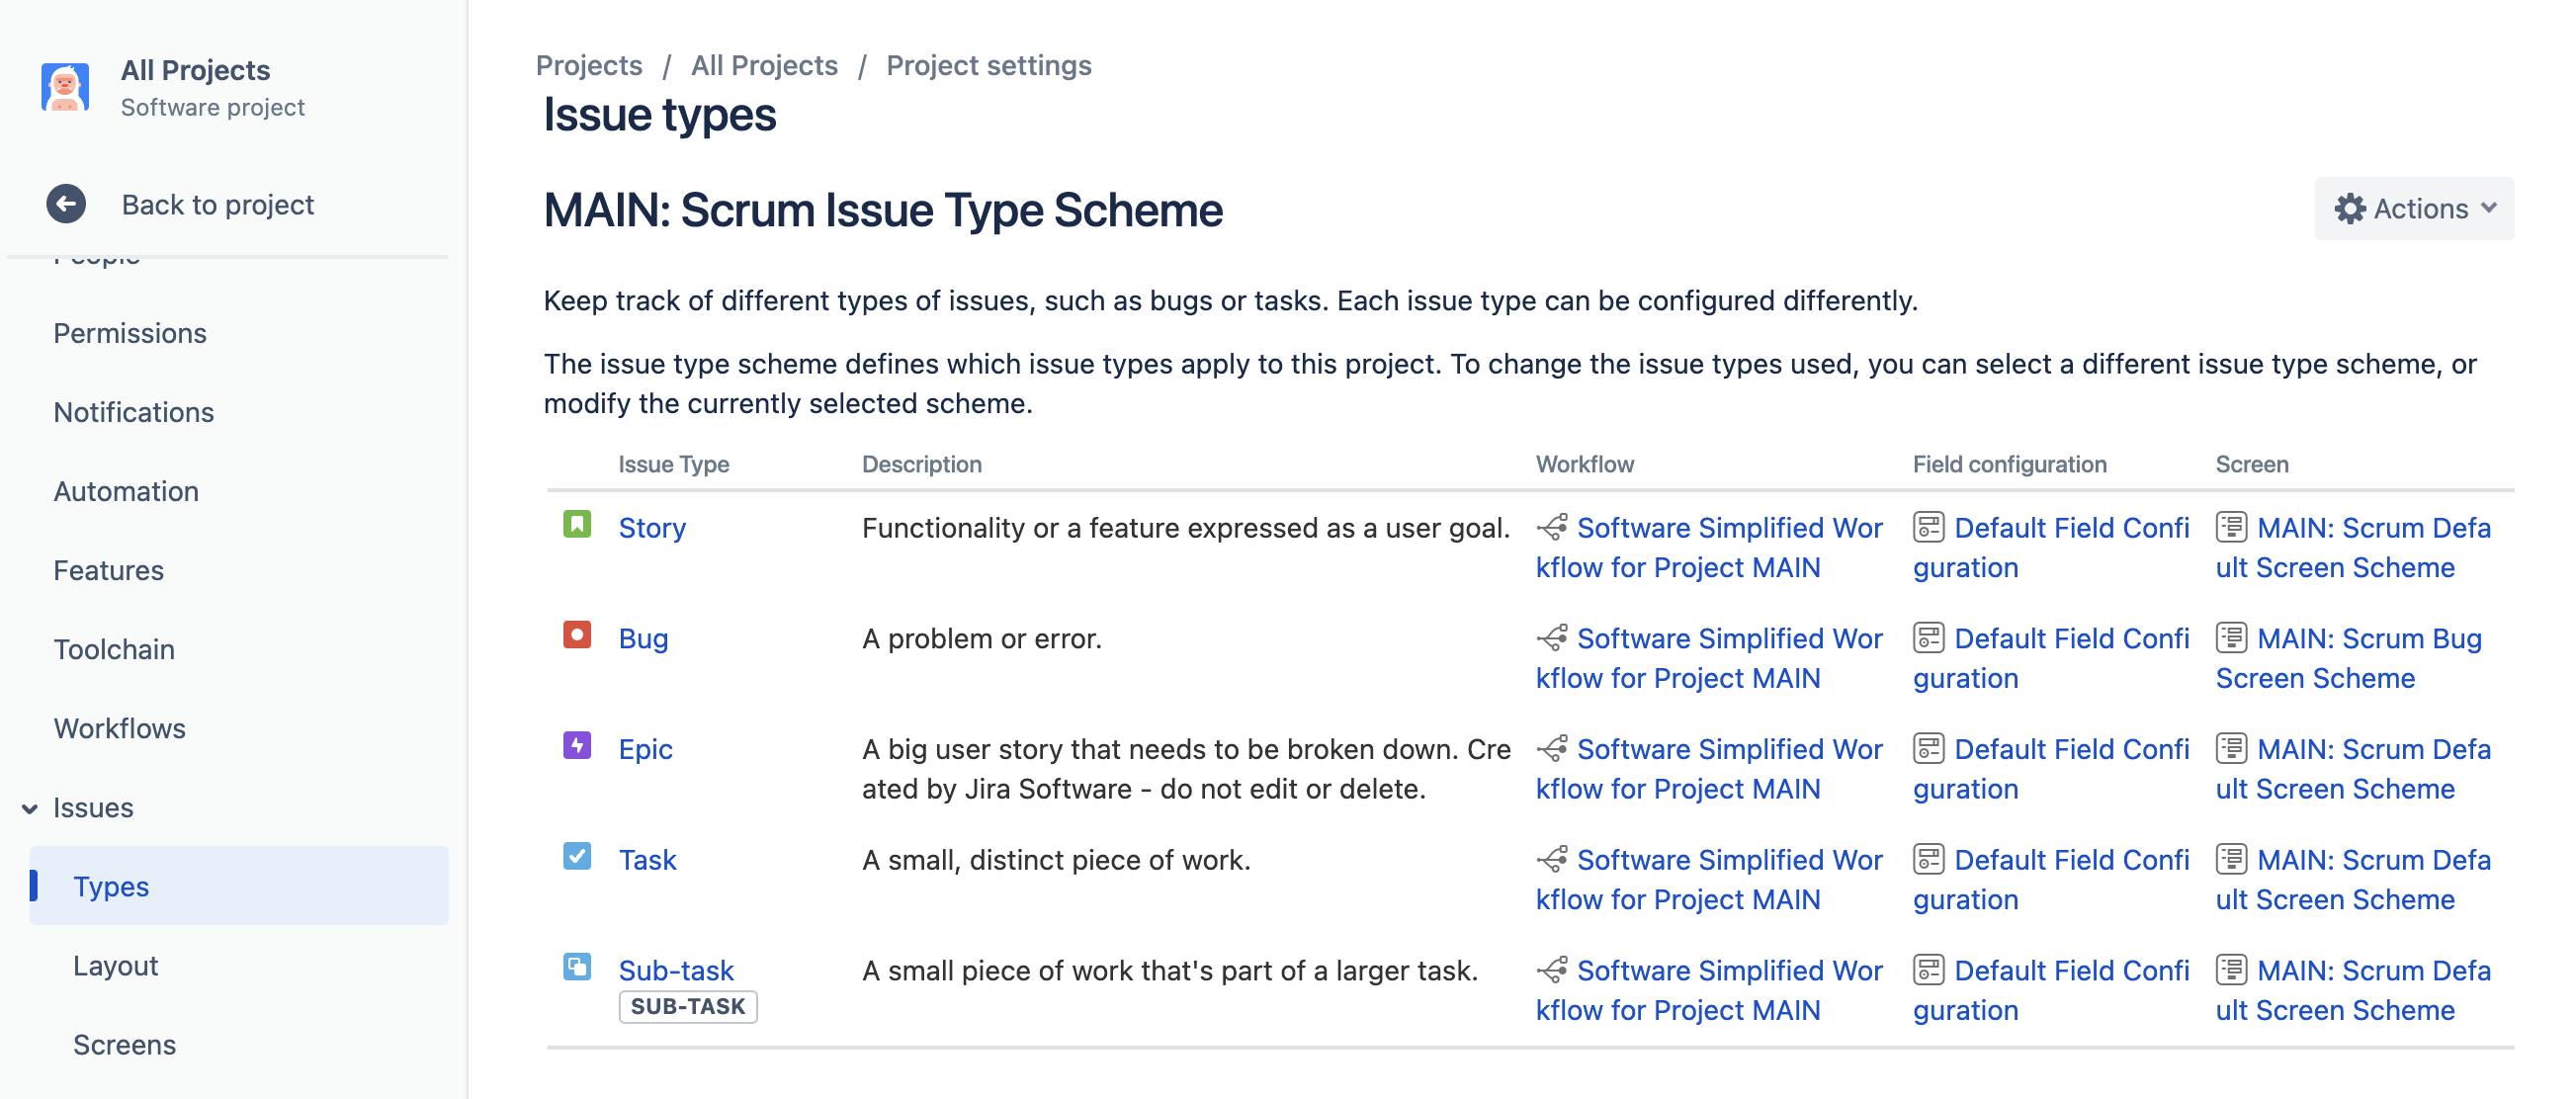
Now click on Actions and Edit issue types
Now drag and drop any types you don't want to use into the right box.
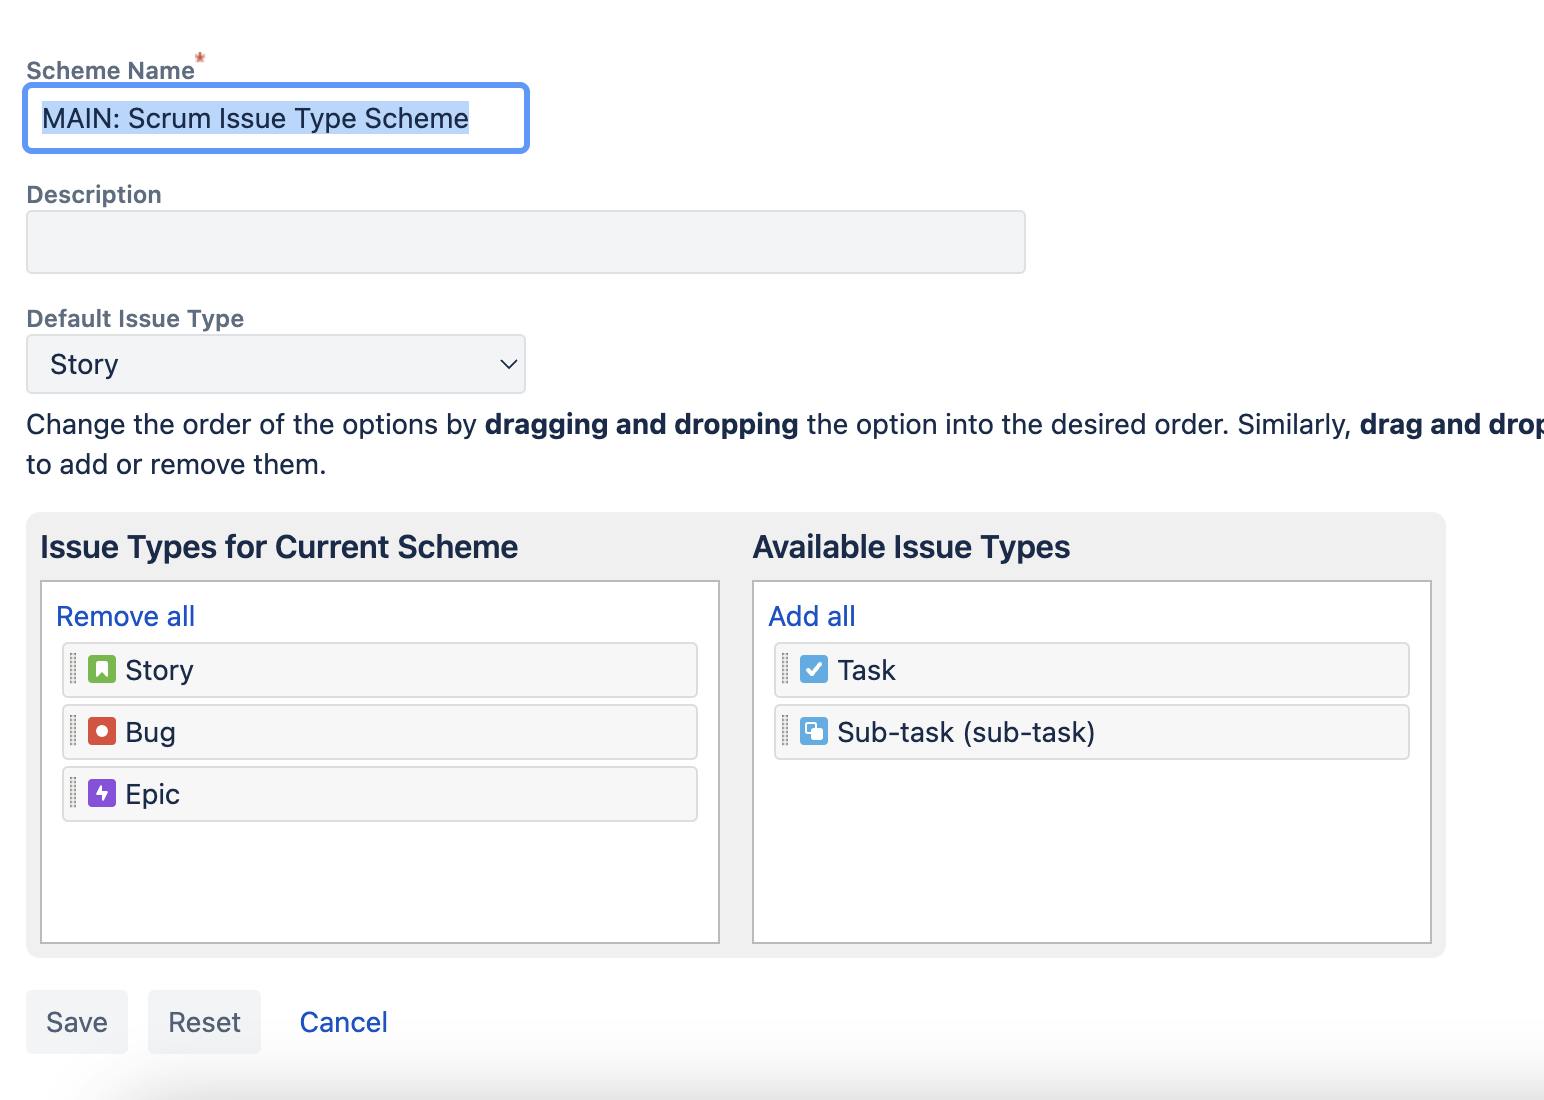
I'll turn off Task and Sub-task as I don't want to use either of those.
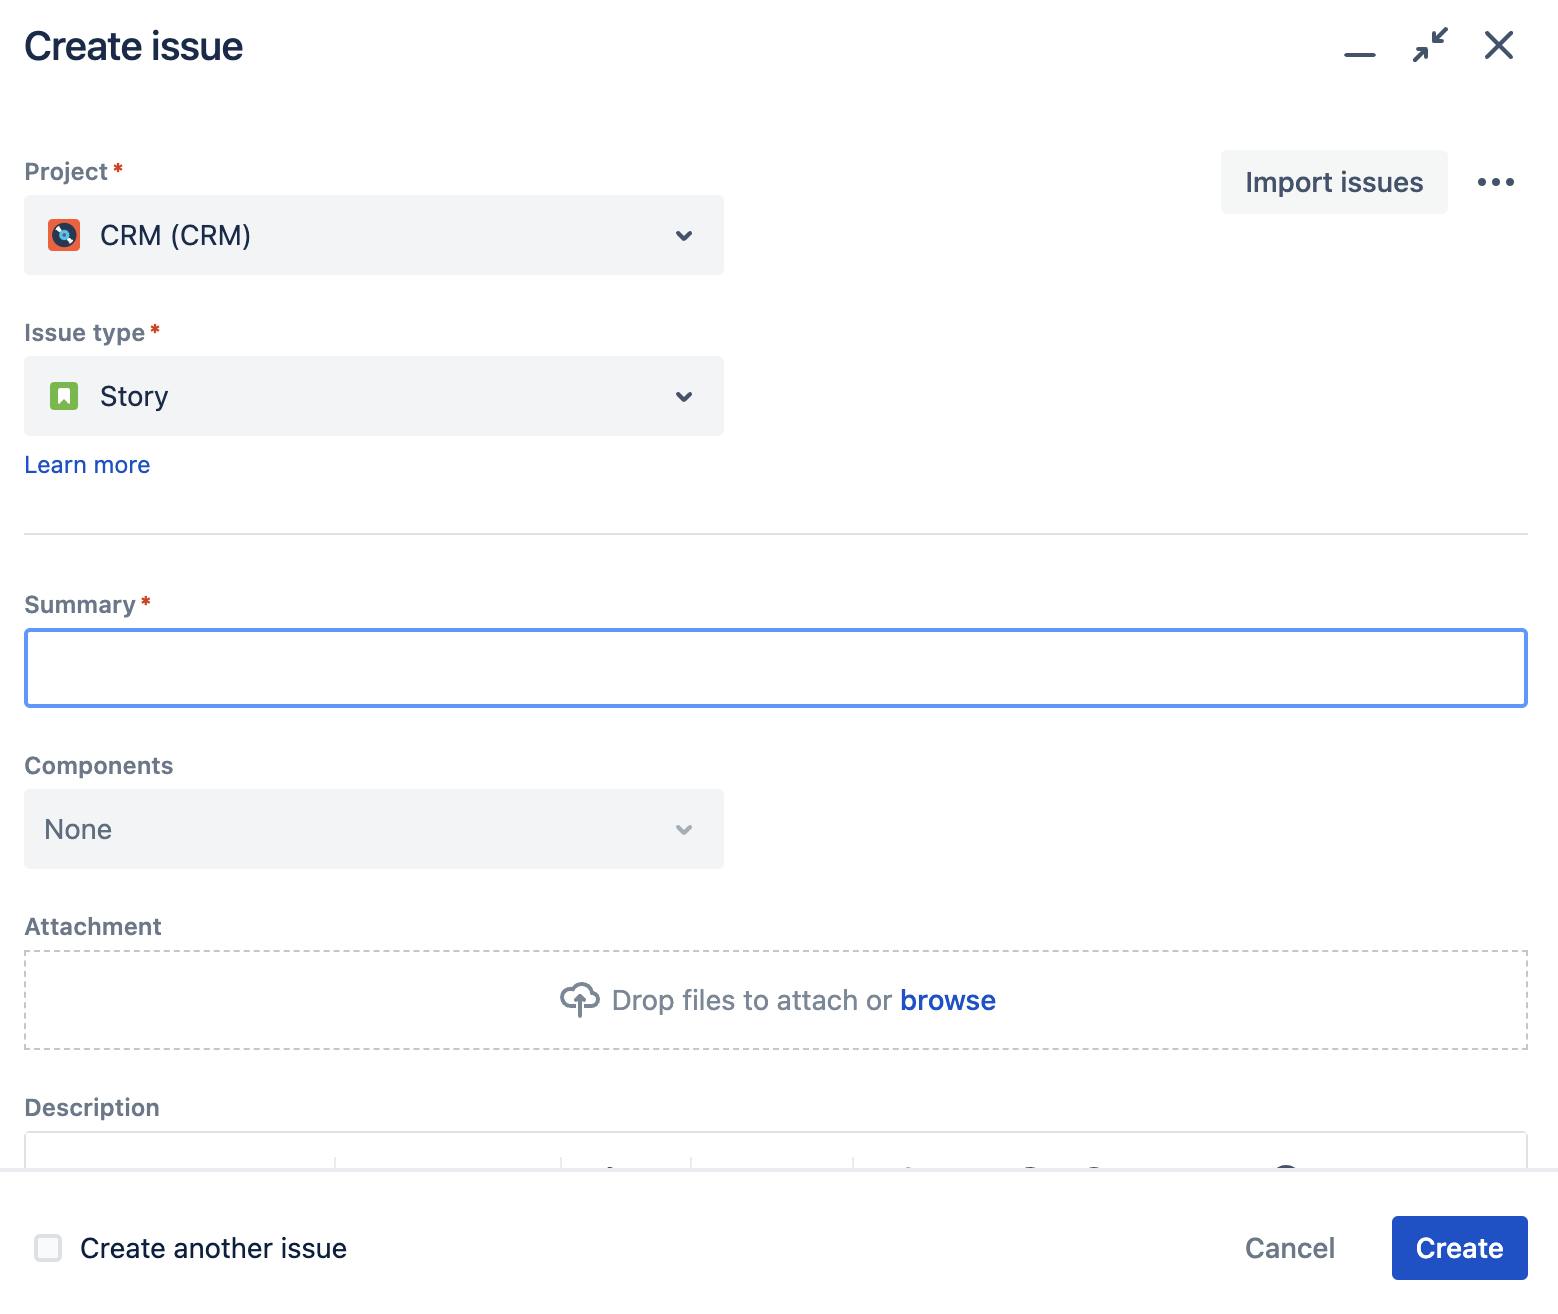
I won't cover every option here. Instead, create a few issues by filling in the form. By default only Summary is required. You can tick the checkbox at the bottom to keep the modal open allowing you to create multiple issues one after another.
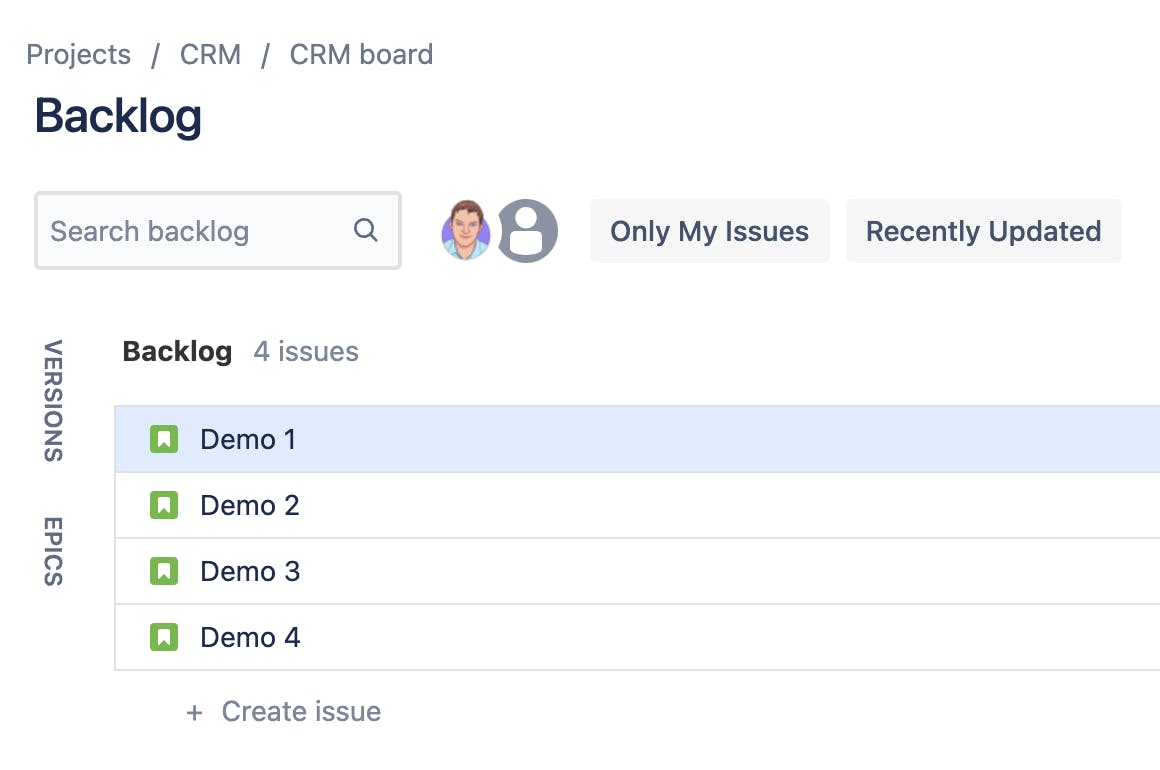
Once you've closed the modal the backlog will refresh and show the created issues.
Pull in issues from other projects
Now there are issues I want to be able to see them in the all projects board. Navigate to the All projects project by clicking on Projects then All Projects and click Backlog.
It will be blank since no issues have been created in this project.
In order to pull in issues from other projects we need to apply a filter.
Click on the ... menu on the top right and click Board Settings
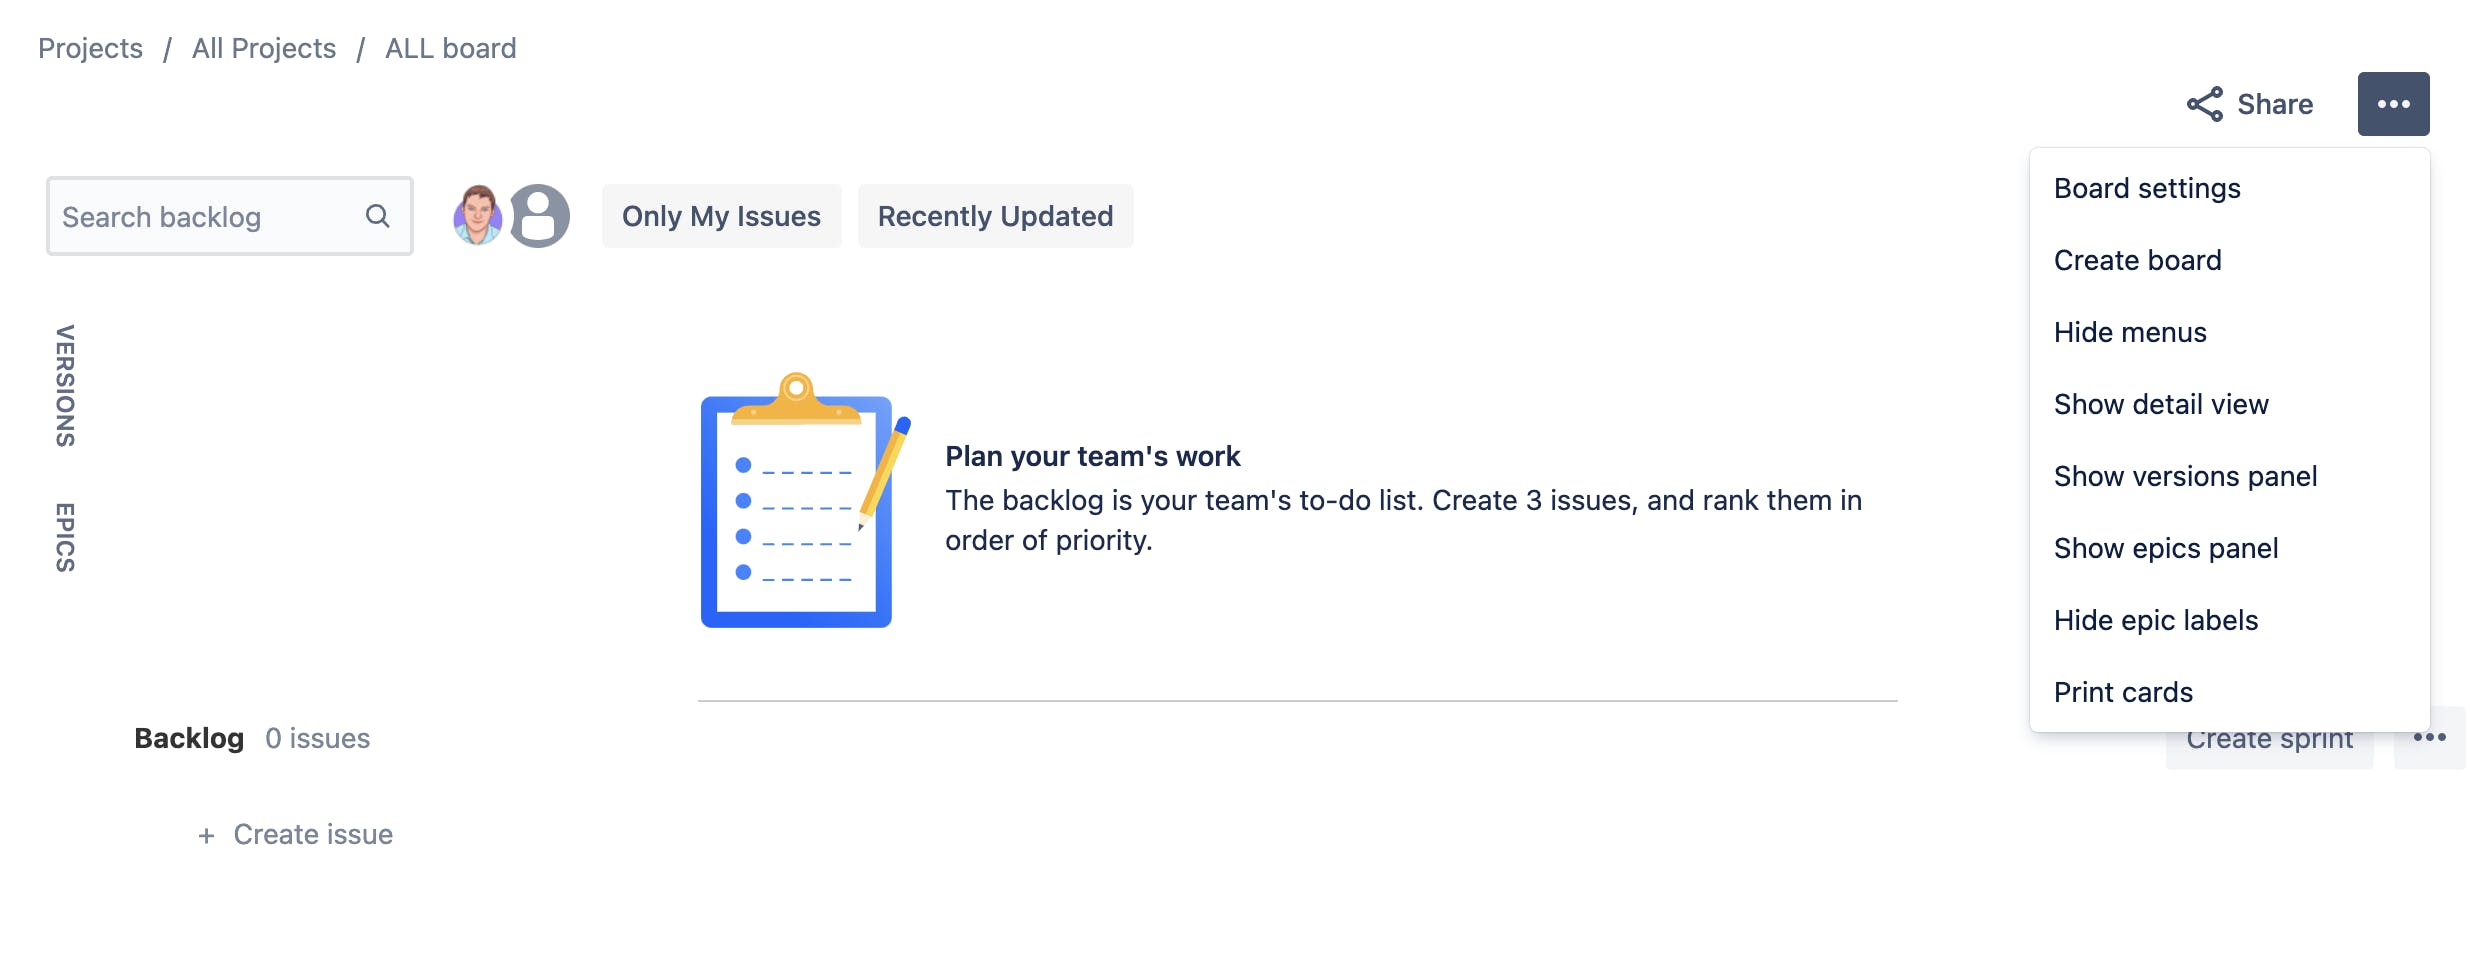
Next click Edit Filter Query
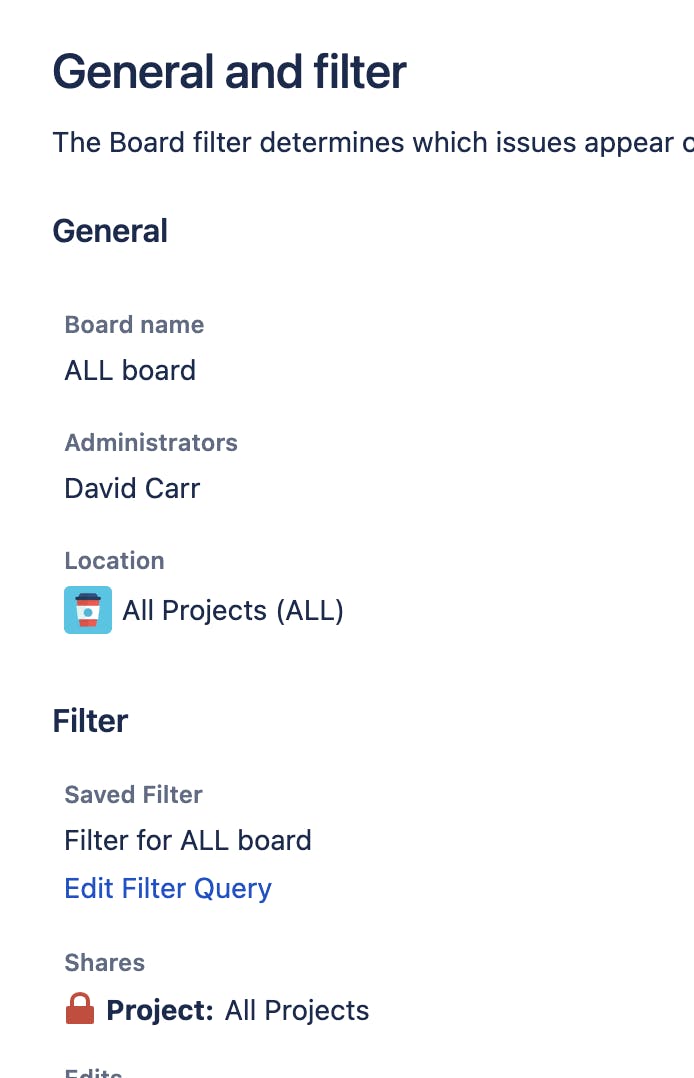
This page shows the current filter the board will use, it used drop-down filter menu allowing you to select projects, type, statuses, assignee and more.
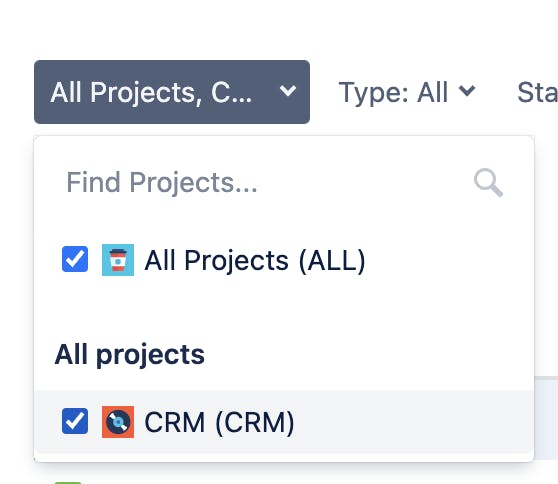
Click All Projects and select the projects you want to pull issues from.
As soon as you tick other projects (CRM in my case) you will see the issues from the project.
Now you can click Save above this menu and save the changes.
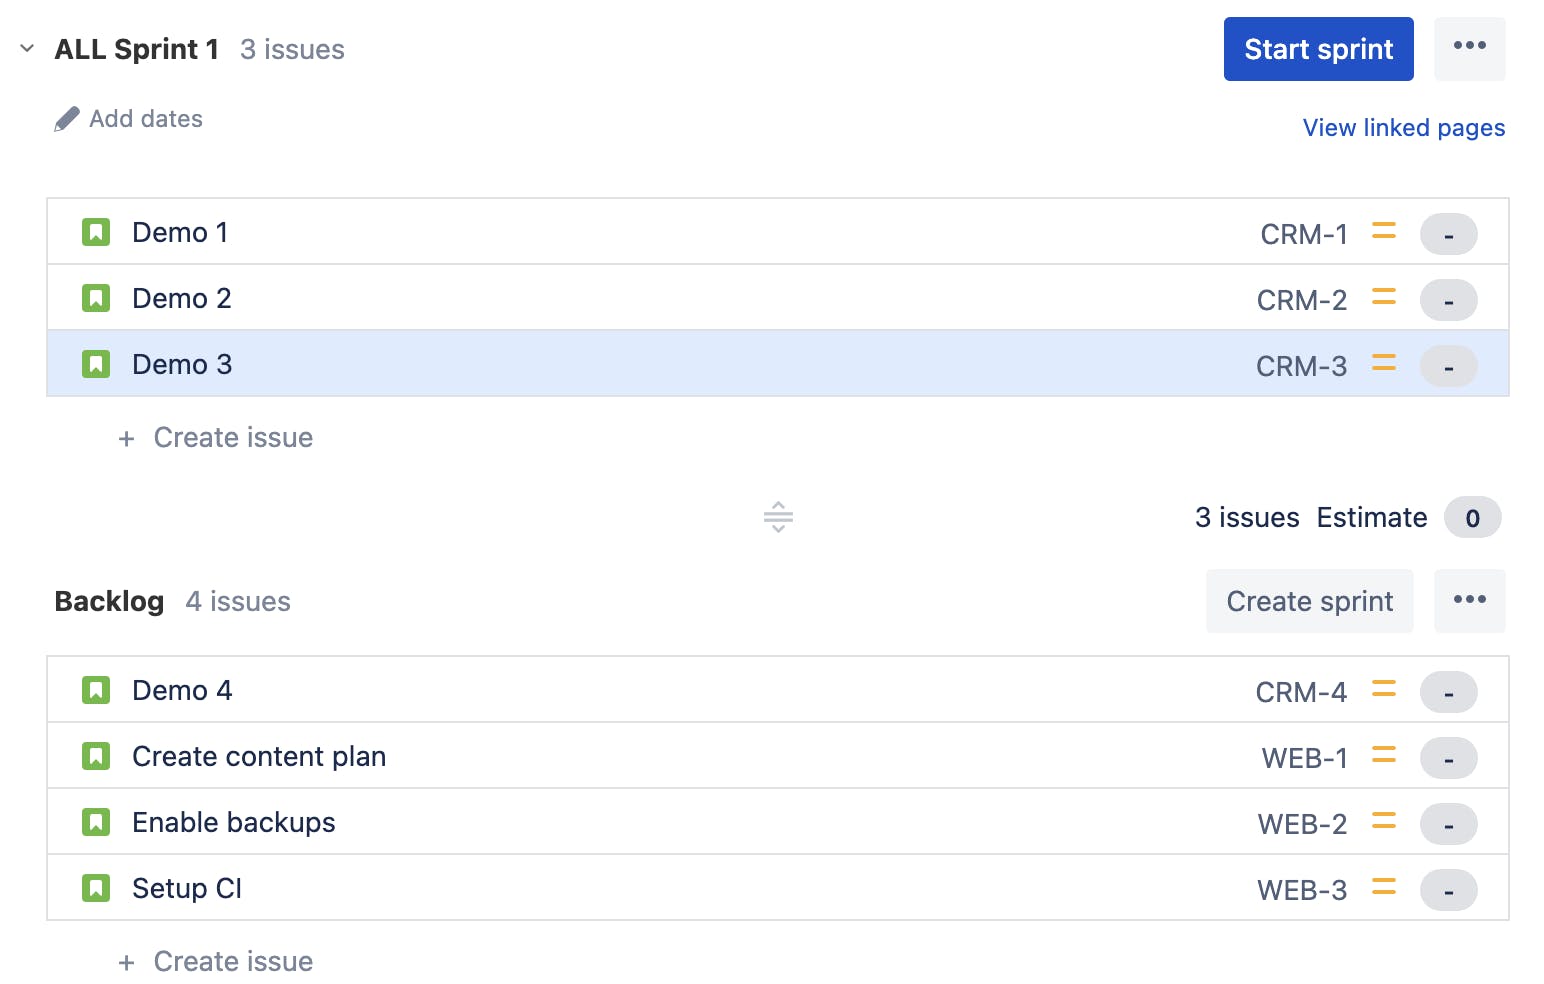
Now going back to the All Projects the board will show all the issues from all the projects selected. What's great about this is you can pull from multiple projects. This allows you to have a central place to see all issues from all projects.
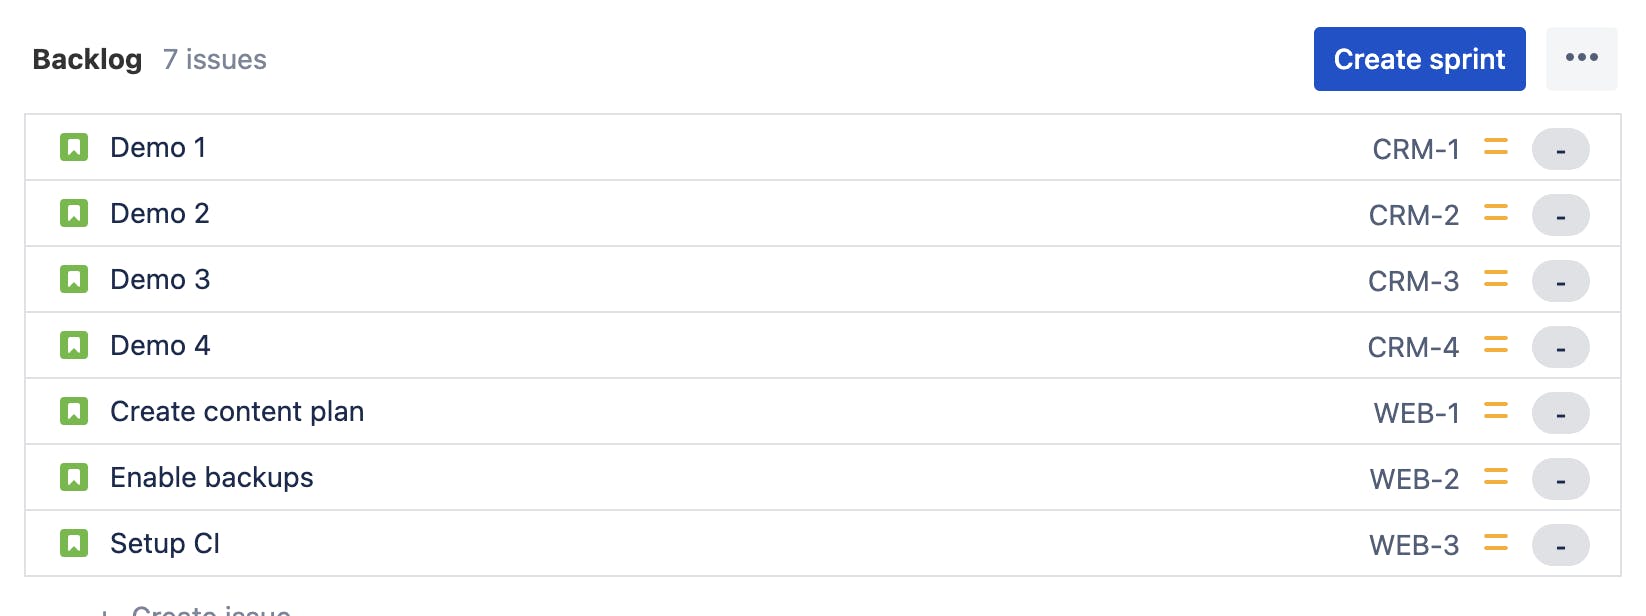
I've created another project, used the same steps as above and created some issues and linked them to the board to illustrate this.
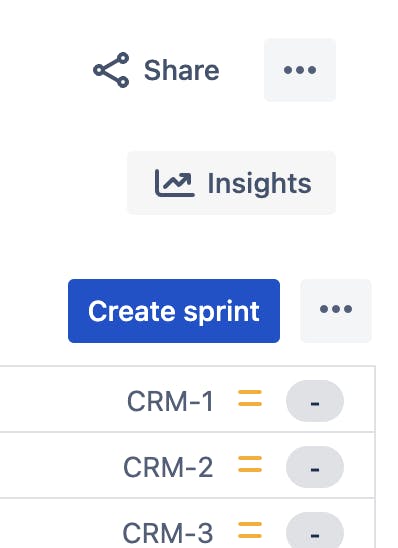
Notice the issue key on the far right. The bottom 3 issues are from a project called Website and the top 4 issues are from a CRM project.
Filter issues by project
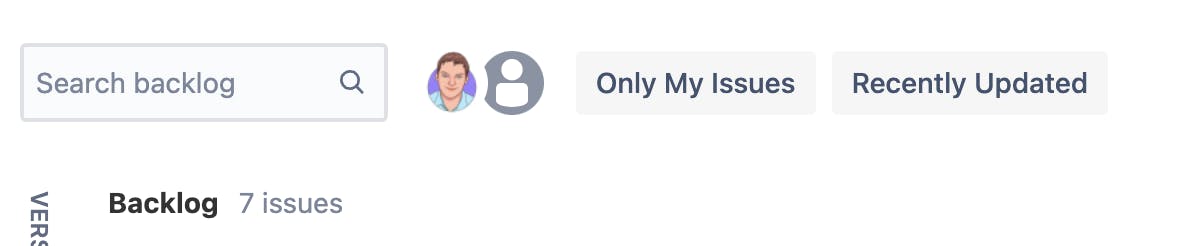
Now I can see all issues I would like to be able to filter down issues to specific projects. Looking at the default filters:
I can filter by who is assigned to an issue, my issues, and recently updated issues.
In order to add a new filter open the board settings by Click on the ... on the top right and click Board Settings
Next click Quick Filters
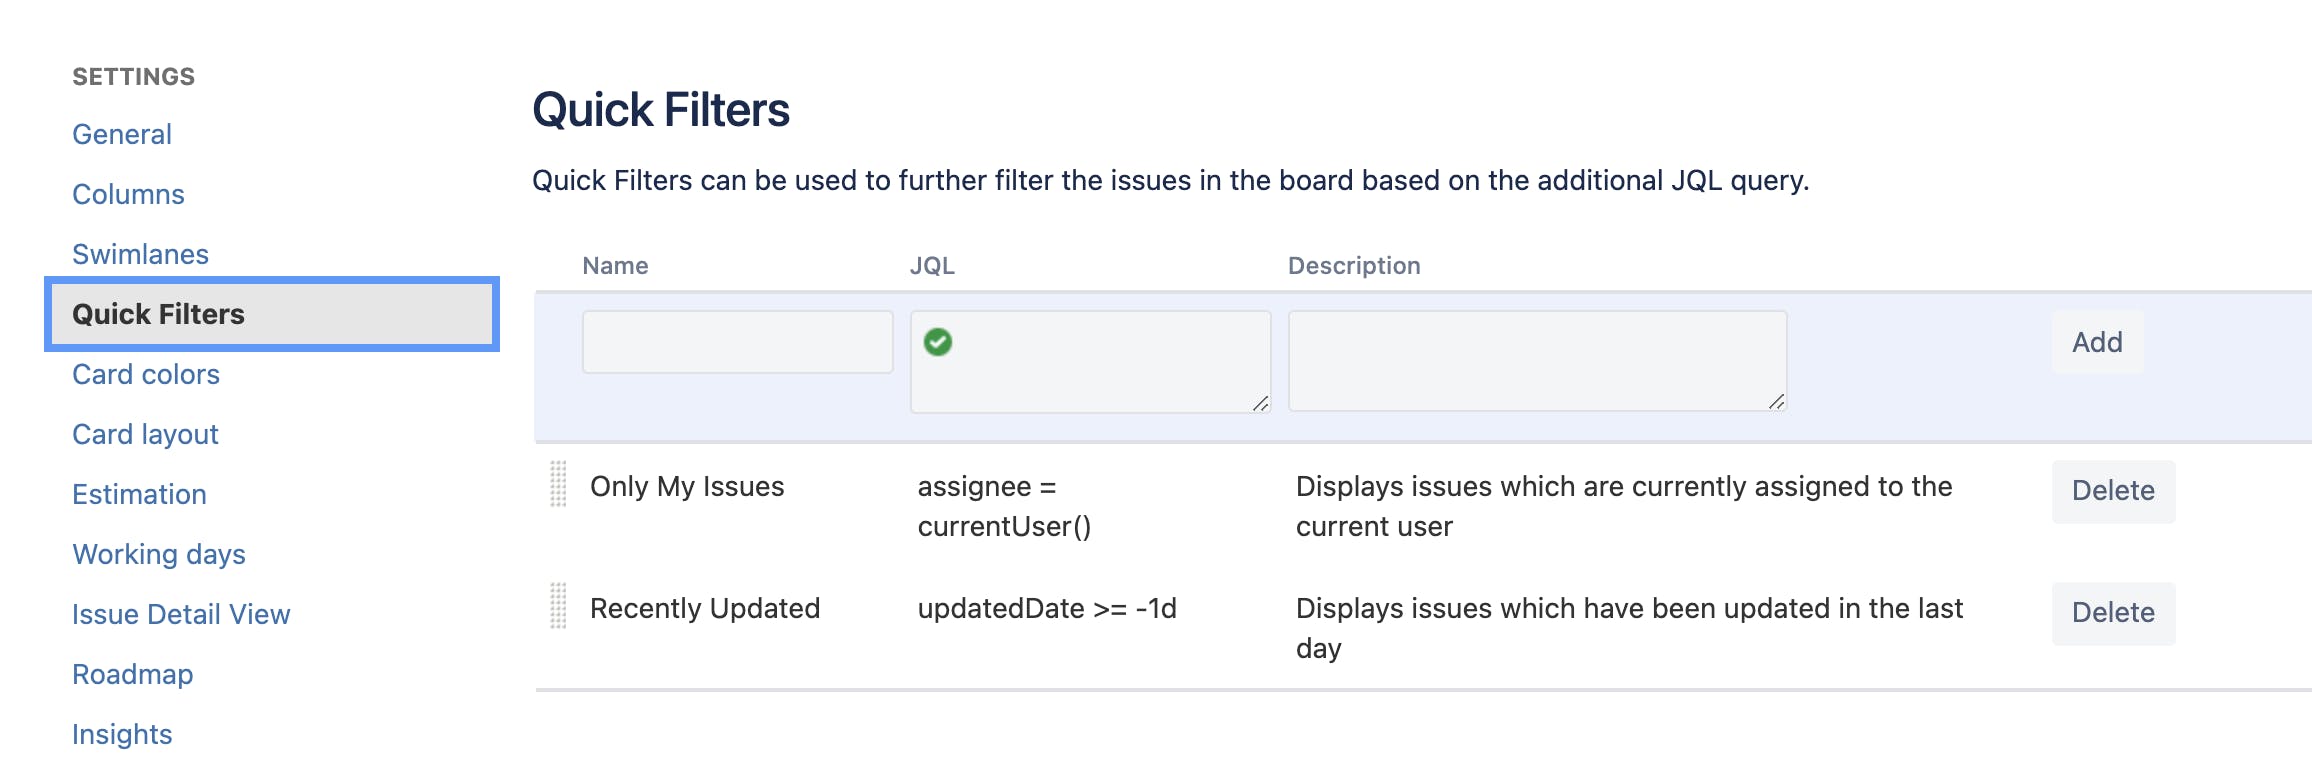
To add a new filter I will need to use their JQL language, it's easy to use as you'll see.
In the empty row give the filter the name of the project. Then in the JQL box enter project=ProjectName I have a project called CRM so I enter project=CRM
optionally add a description.
Click add and then go back to the board.
CRM is now a filter option. I like to create a filter for each project.

You are not limited to projects you can filter by anything JQL supports that stands for Jira Query Language
Creating Sprints
To create a sprint click Create Sprint from the backlog.
Clicking it will create a blank sprint.
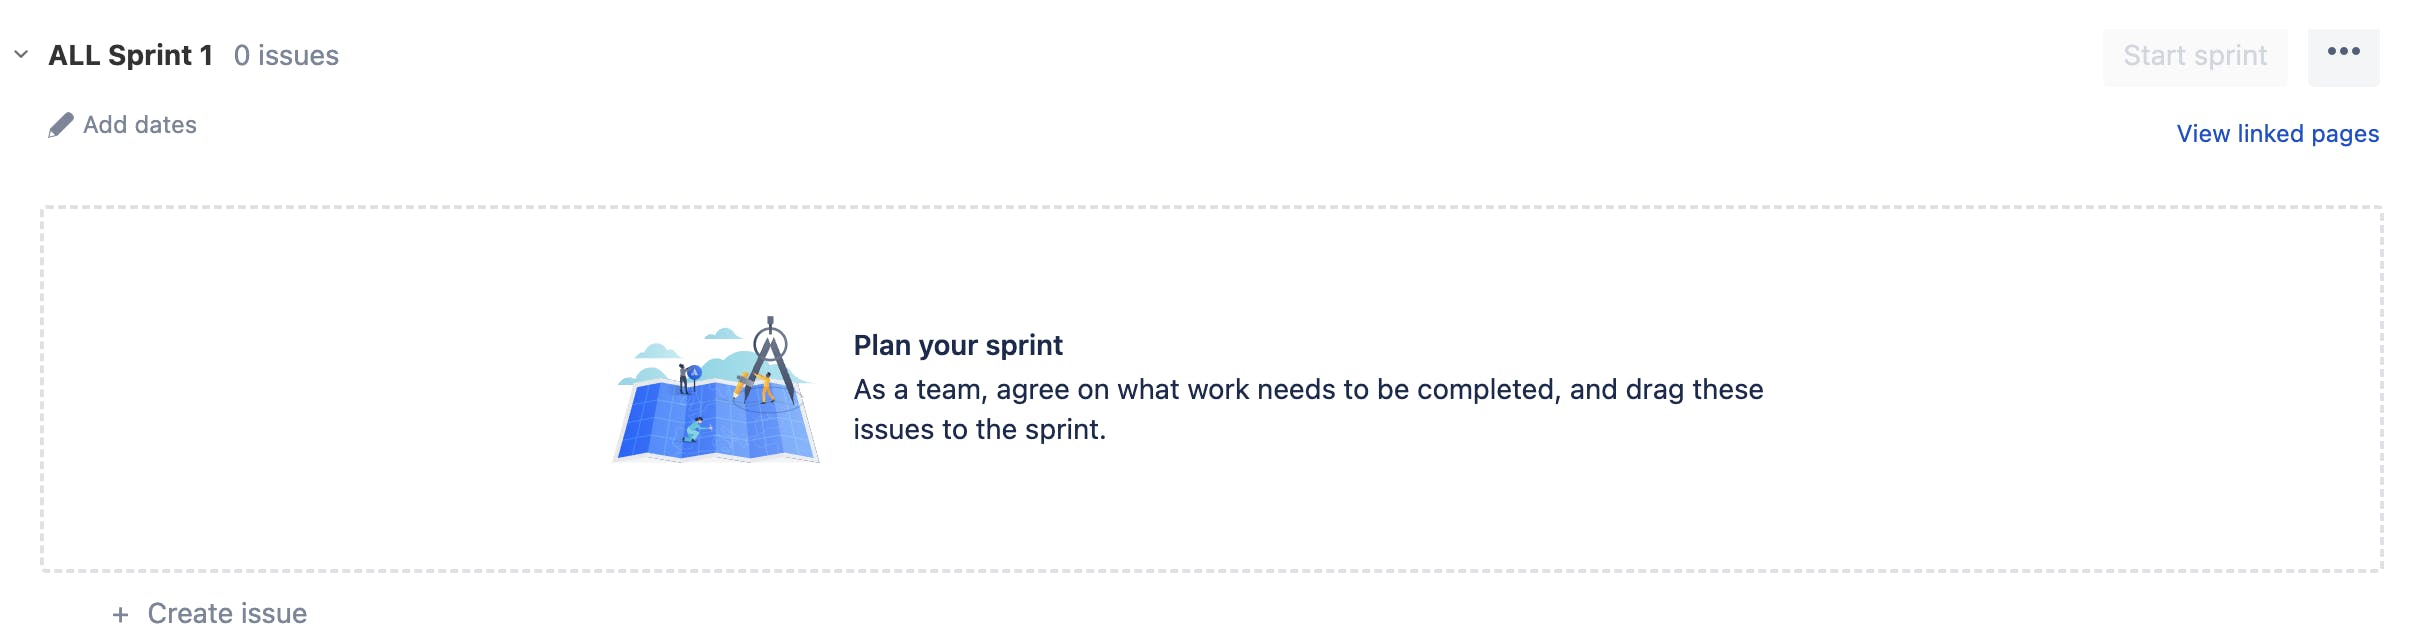
Now you can drag and drop issues into the sprint
By default sprints have no dates, click the pencil icon under the sprint name to edit the dates
Once you've added the time period and assigned all tasks to the team members and estimated the issues you're ready for the sprint to start.
I'll cover estimating shortly.
Sprint Setup
I like to create multiple sprints but not to be used as sprints but to be used as placeholders.
Looking just above the backlog on the right is a Create sprint button you can add multiple sprints using this and then rename them.
Press the button twice. Rename the sprint above the backlog to Needs Estimating and the sprint above to Ready for Sprint
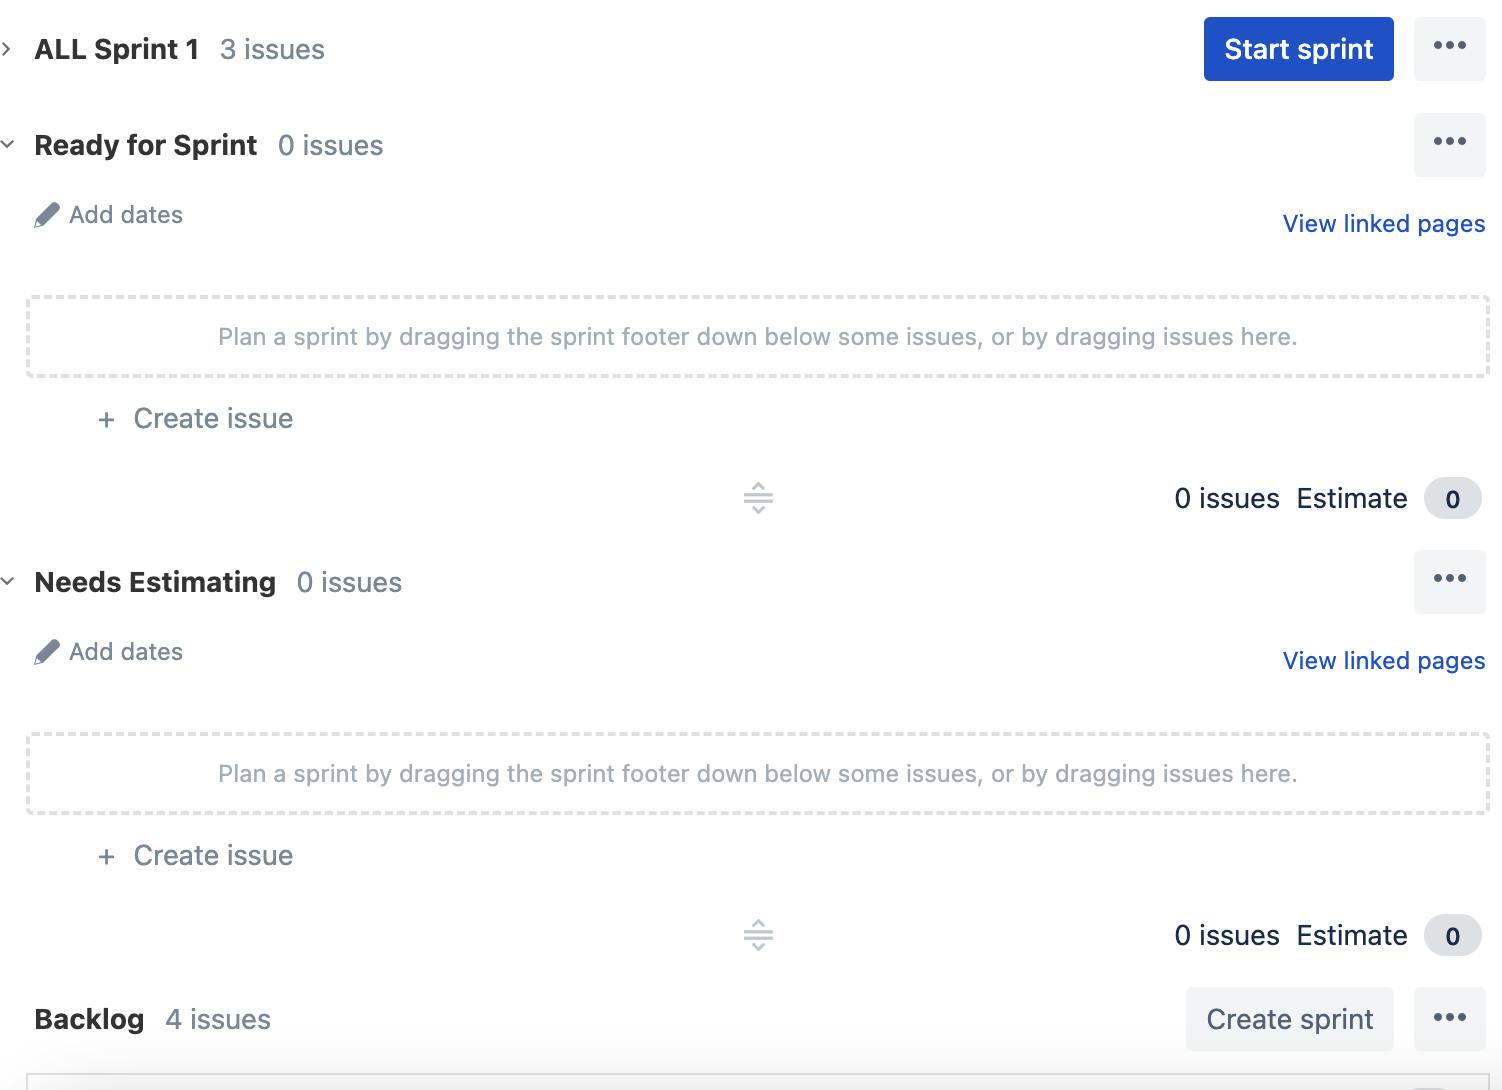
The workflow I like to follow is.
Backlog holds issues that need descriptions adding to them
Needs Estimating for all issues that do not have time estimates
Ready for sprint for all issues that are ready to be used in future sprints.
I find working this way makes planning sprints much easier, as you can see at a glance which issues need work in order to progress.
Story Points and Estimates
Story points are a unitless estimate in the sense you set how difficult a task is with a number, an issue with a story point of 1 is far simpler than an issue with a story point of 5, which is thought to be 5 times more complex.
Personally, I don't like this. I like to think of story points as hours. The reason for this is story points are displayed on the issue list so by using them as hours you can see at a glance the time needed for each task.
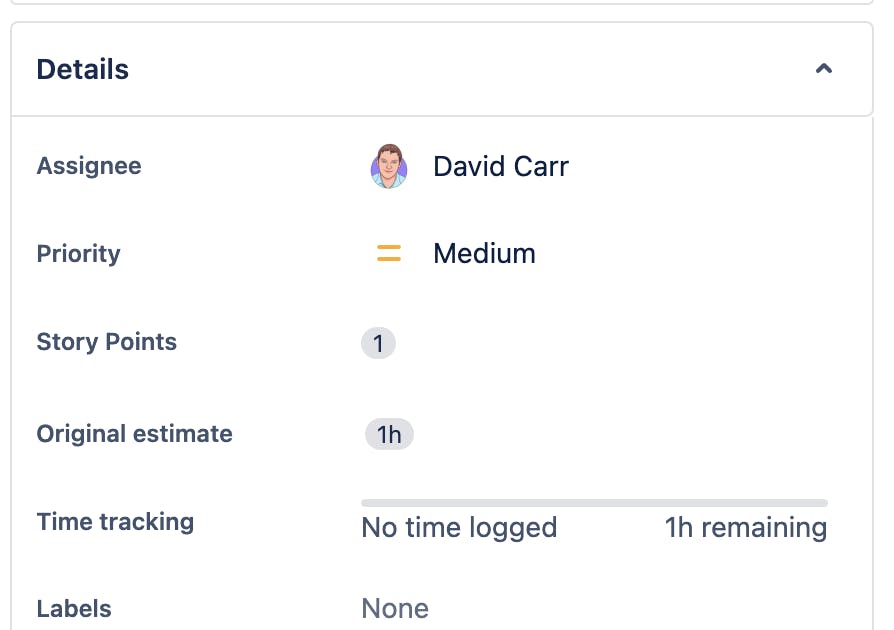
There are time fields on the issue, open an issue by clicking on it.
a sidebar to the right will open
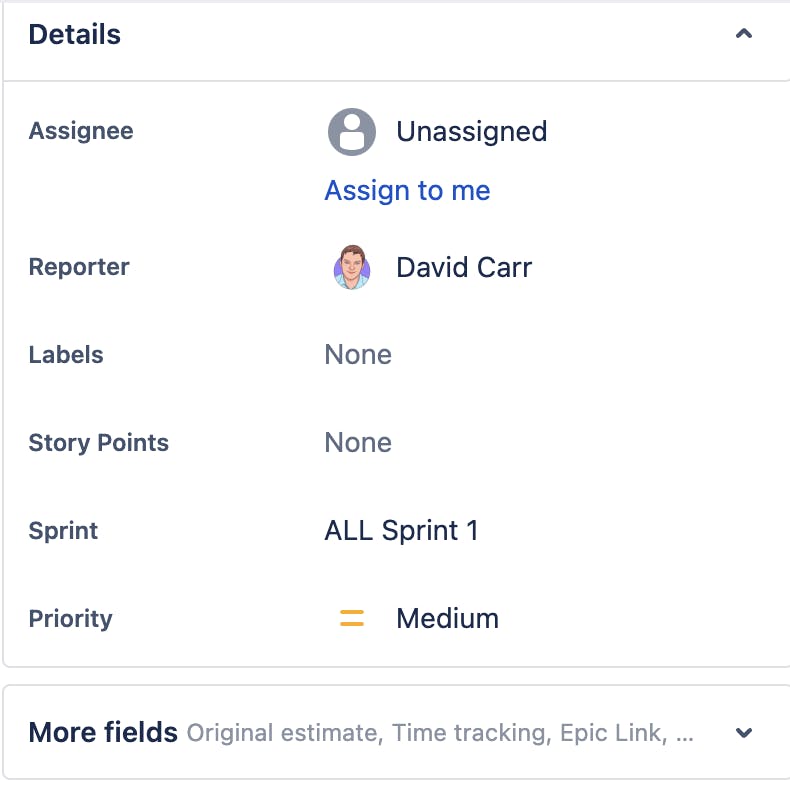
This is the default configuration, the story points are ready to be used. Looking further down in the next box called More fields
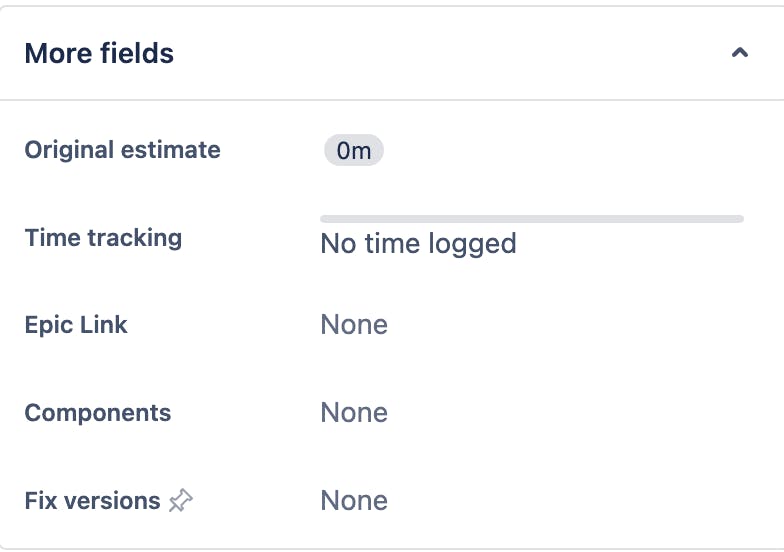
This has the time estimate fields. How I like to work is I put the same hours in the original estimate as in the story point which then adds the remaining time to the time tracking field.
Since this is important I can group them with the story point field.
Configure issue fields
Clicking into an issue will open the sidebar like above, scrolling to the bottom and clicking Configure will open a page where you can add/remove and re-order the fields.
Drag and drop the fields into any order you like.
Anything under hide when empty does not show up by default unless the More fields is pressed. Moving them above will ensure they are always available.
This is the order I prefer:
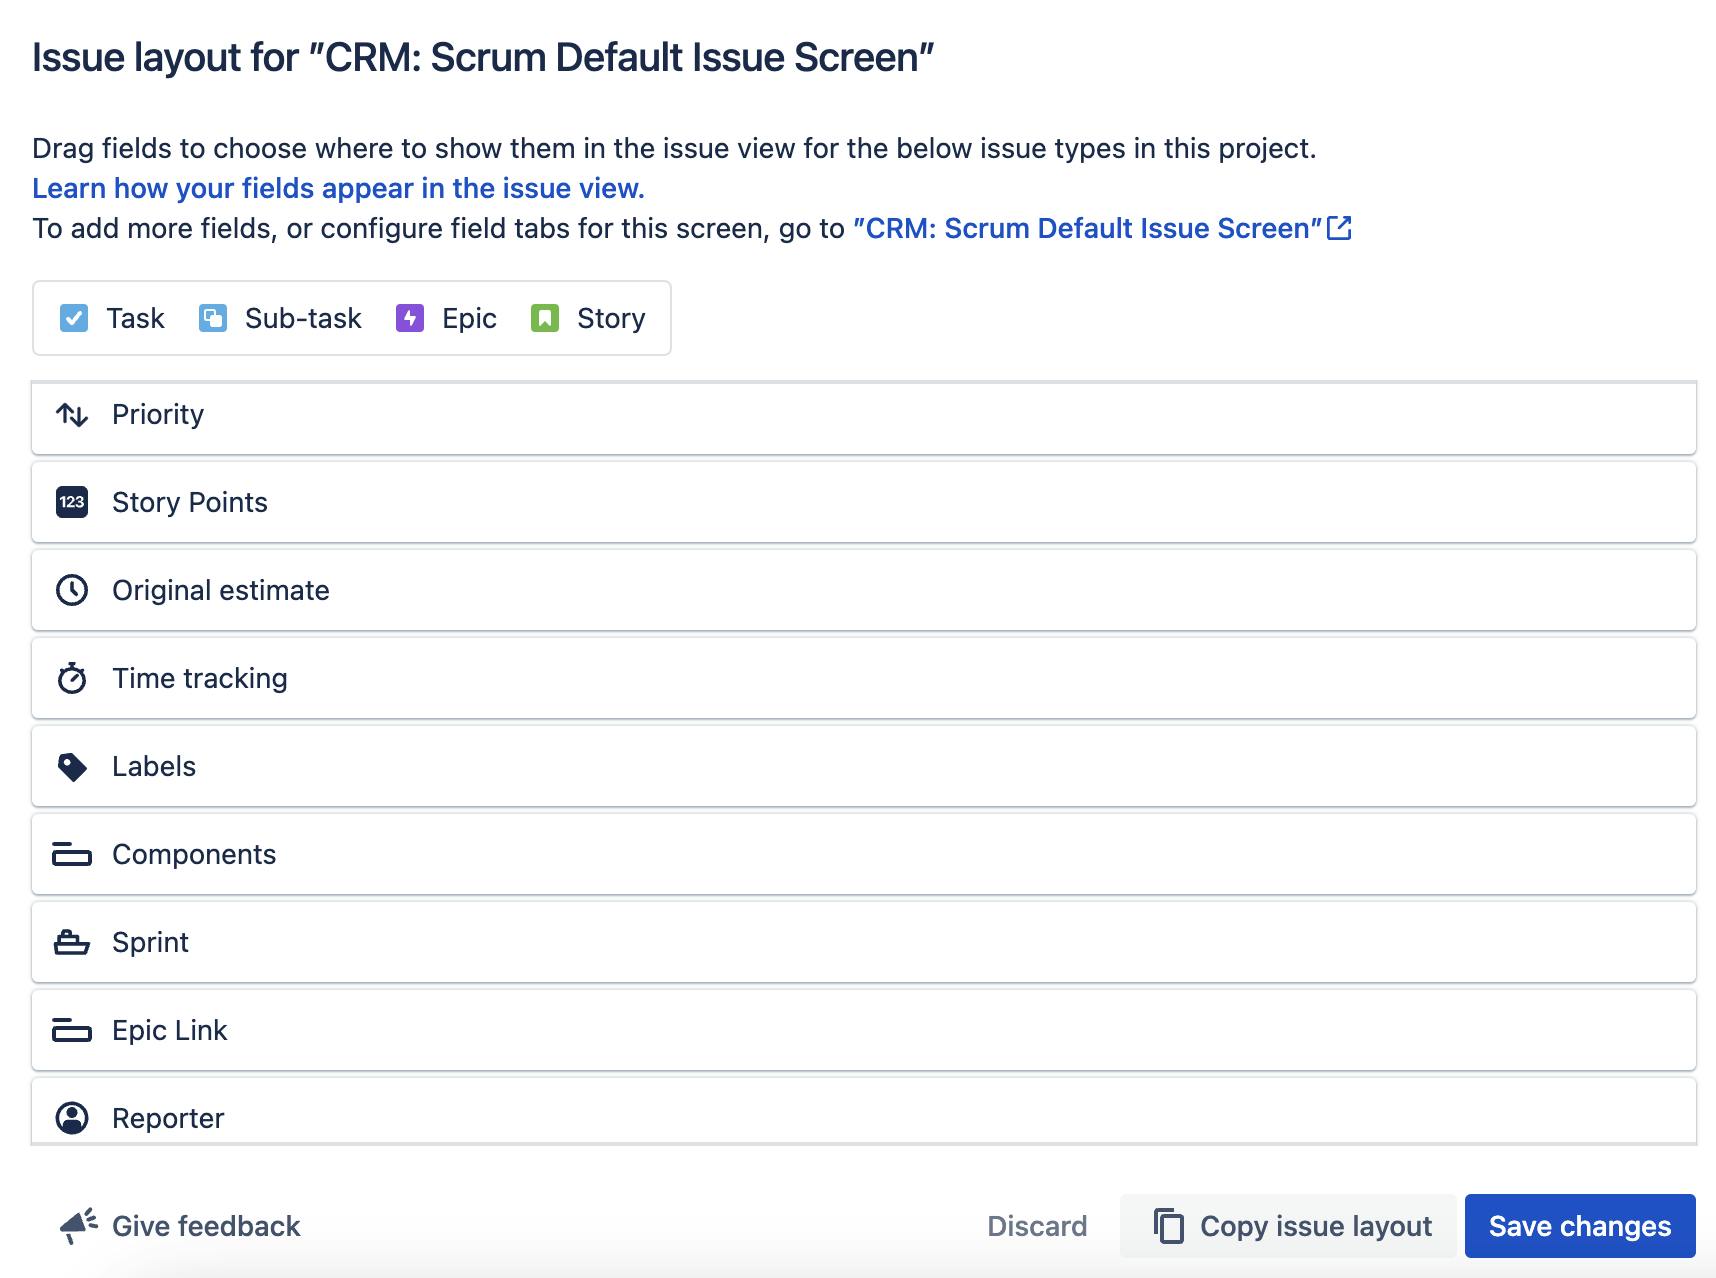
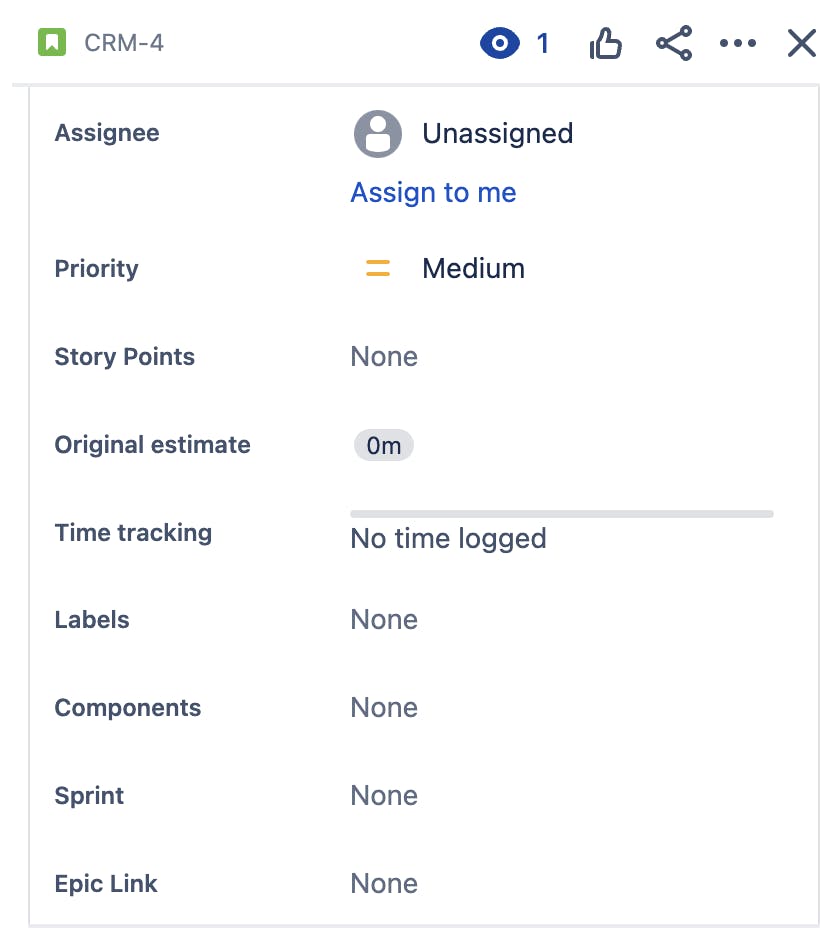
With the new order saved clicking into an issue now looks like this
Starting a sprint
I have a sprint setup with 3 tasks that are estimated and assigned, I can now start the sprint.
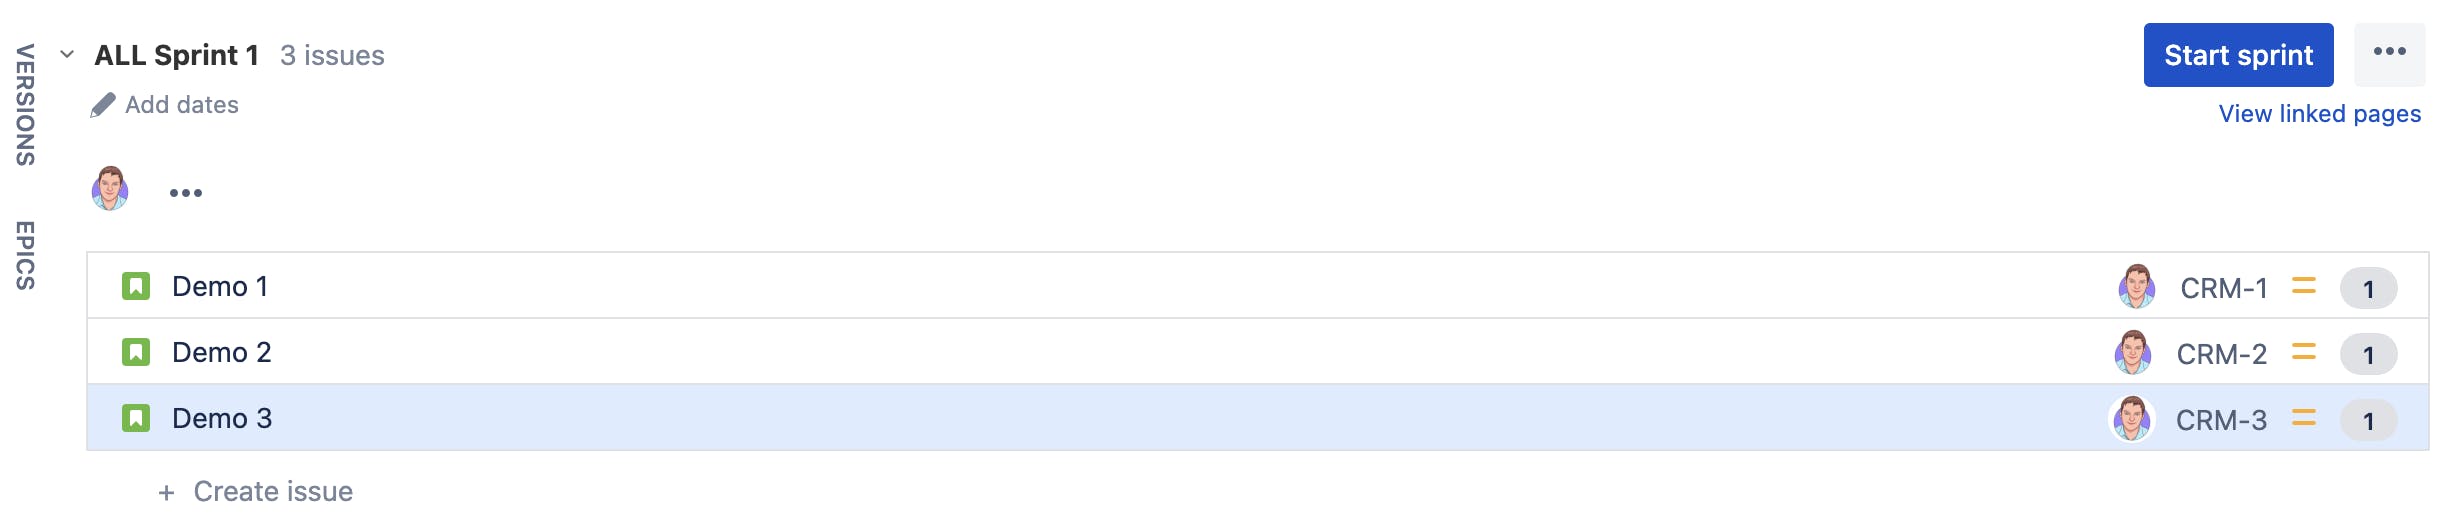
Click Start sprint then a modal will open to set the duration, 2 weeks is the default.
You can enter Sprint goals to document an aim for the sprint.
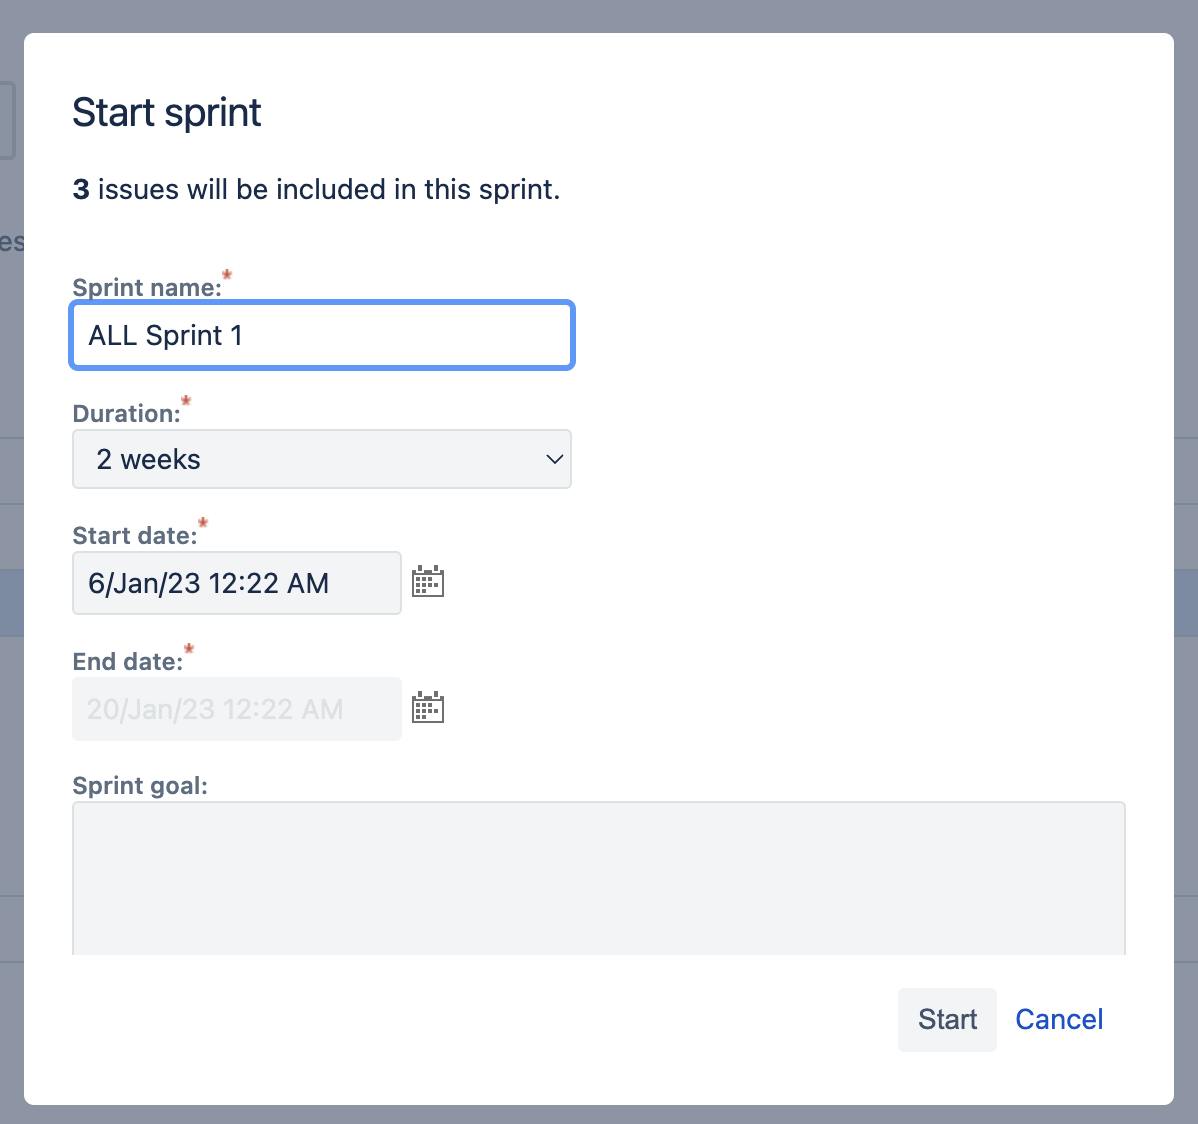
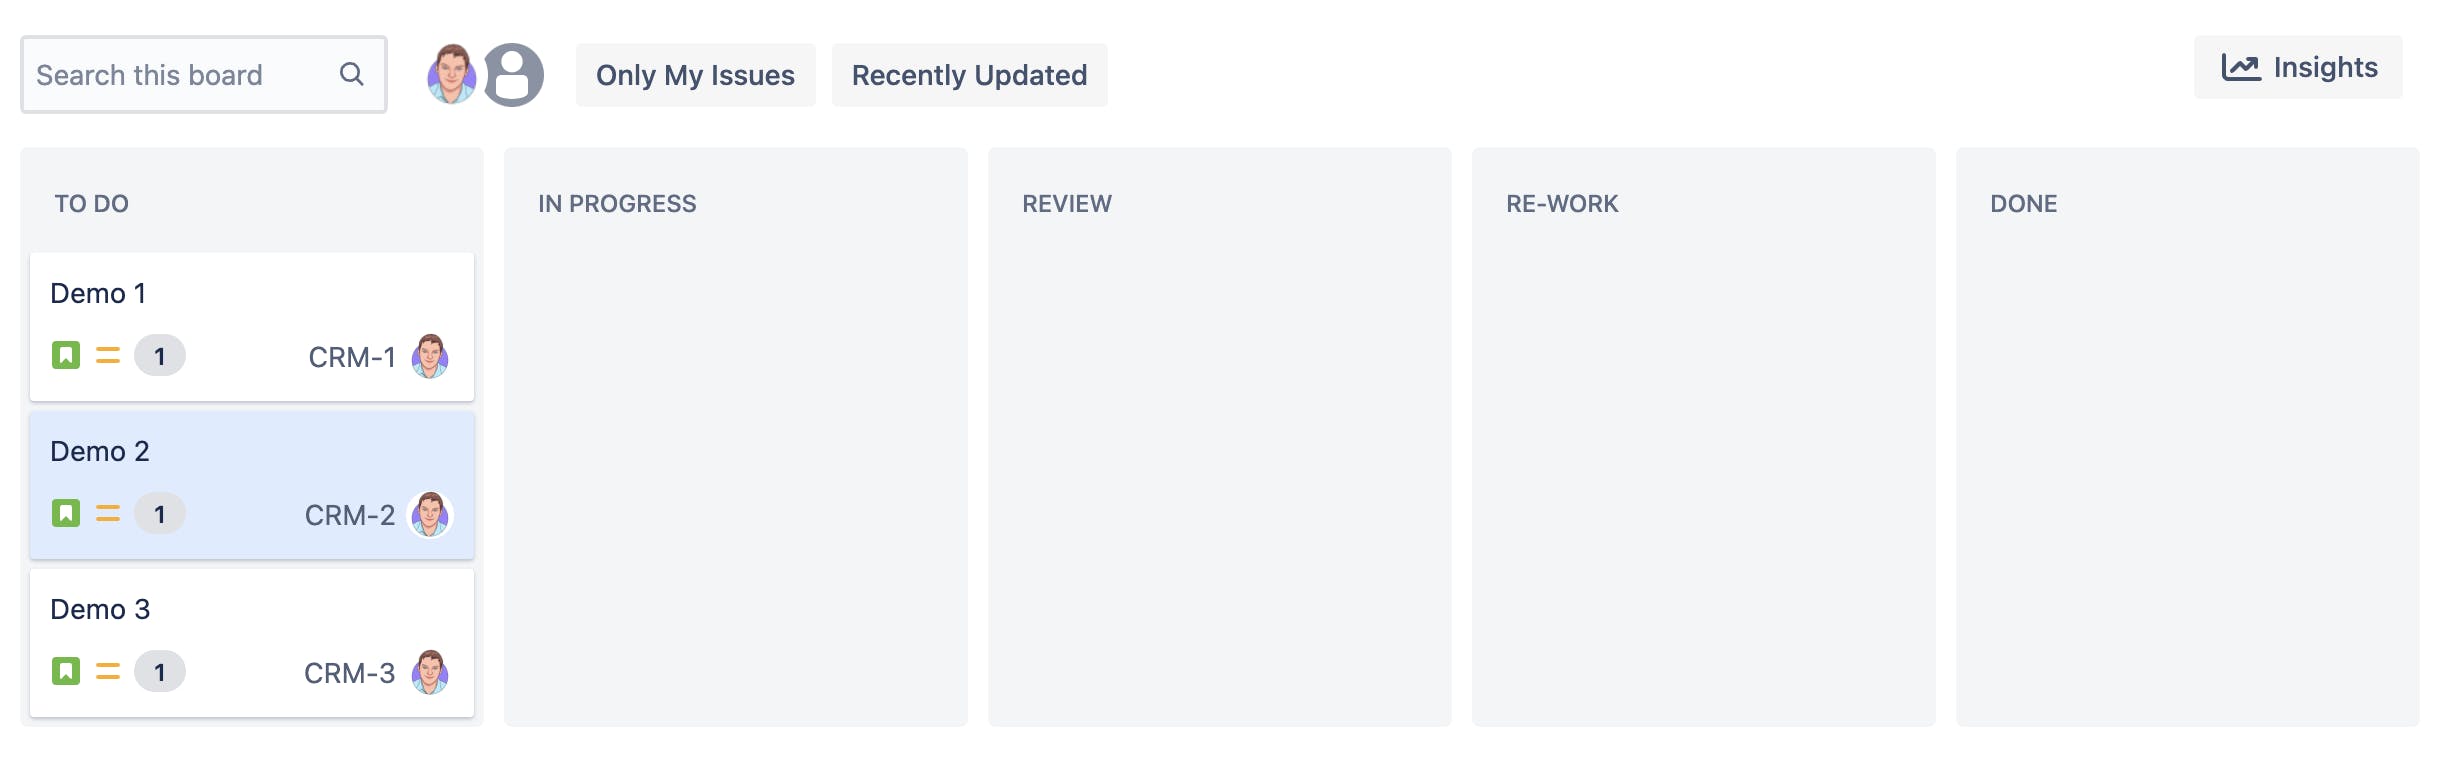
Click Start then the sprint will start, and now you will see a typical KANBAN board.
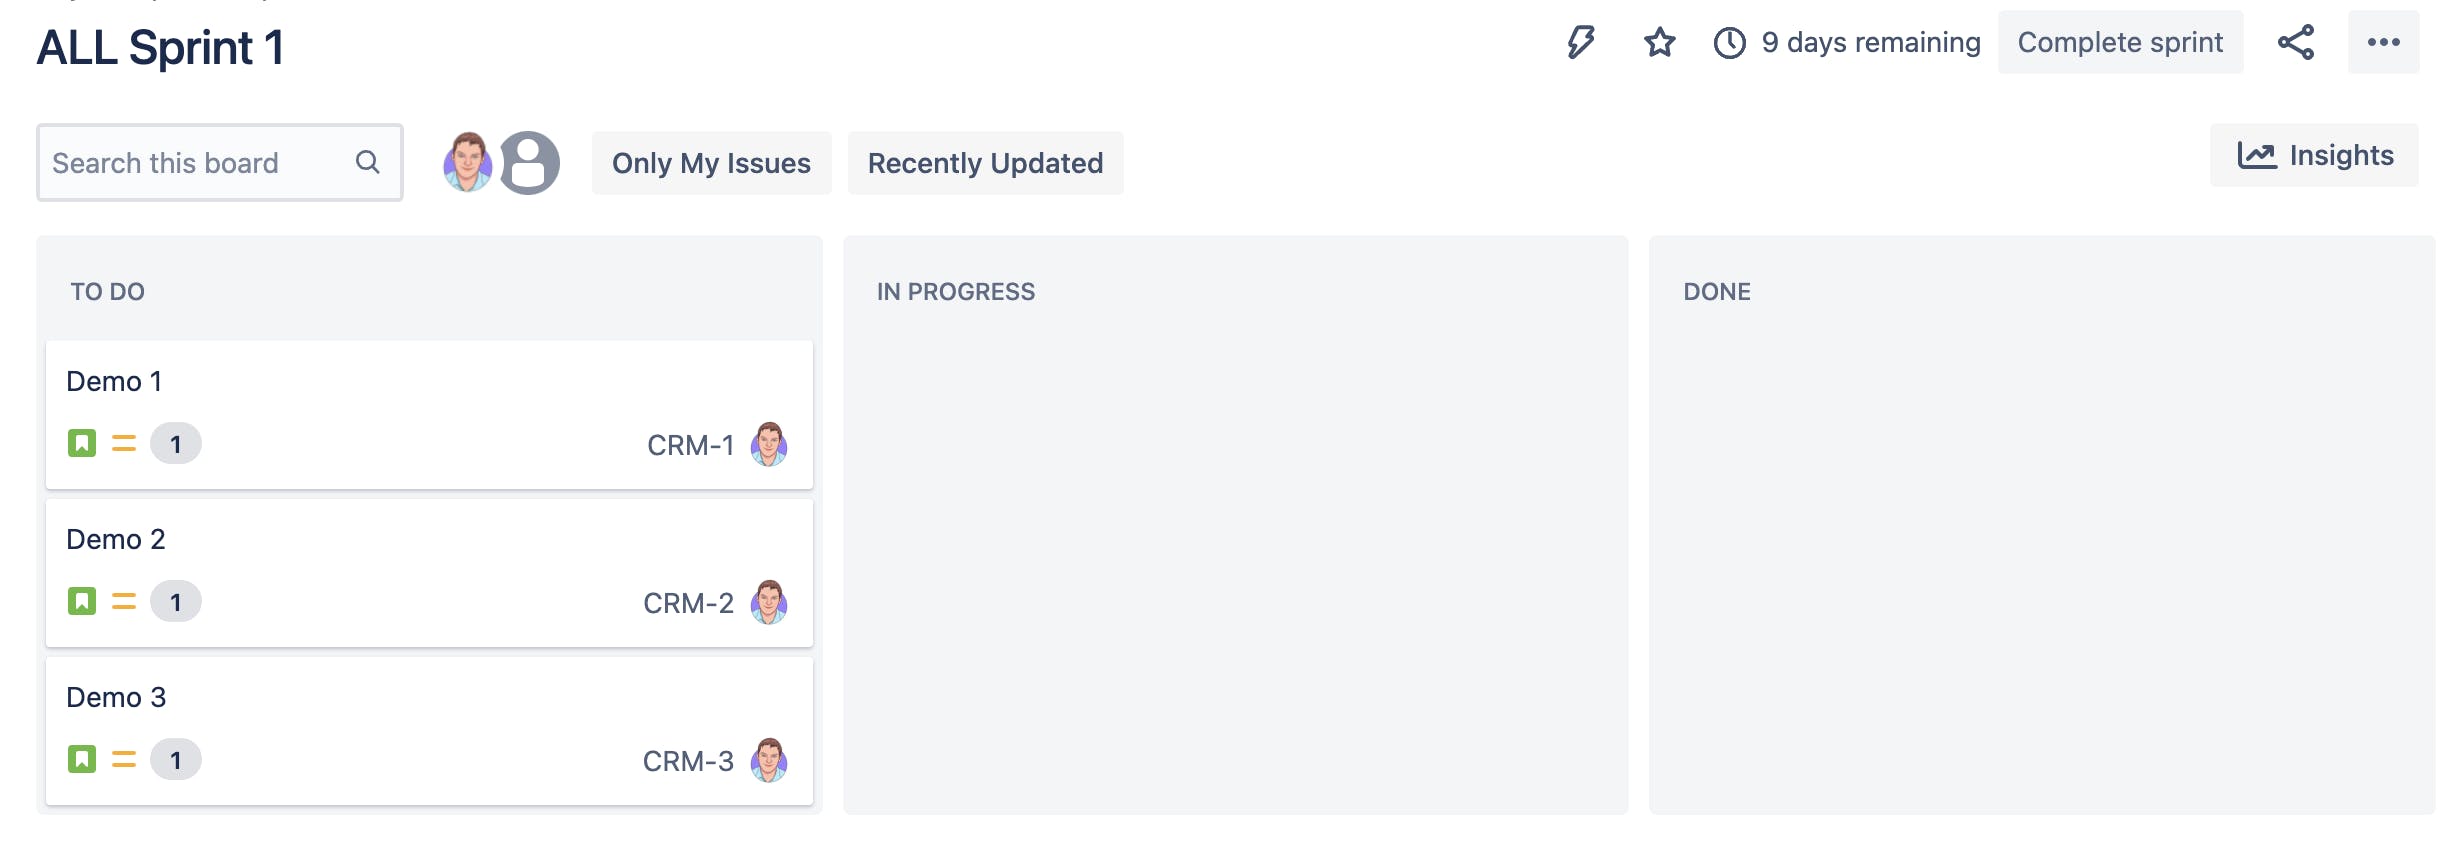
The quick filters are the same as the backlog allowing filtering by project or user assigned.
Click on an issue to open it or drag and drop to move columns.
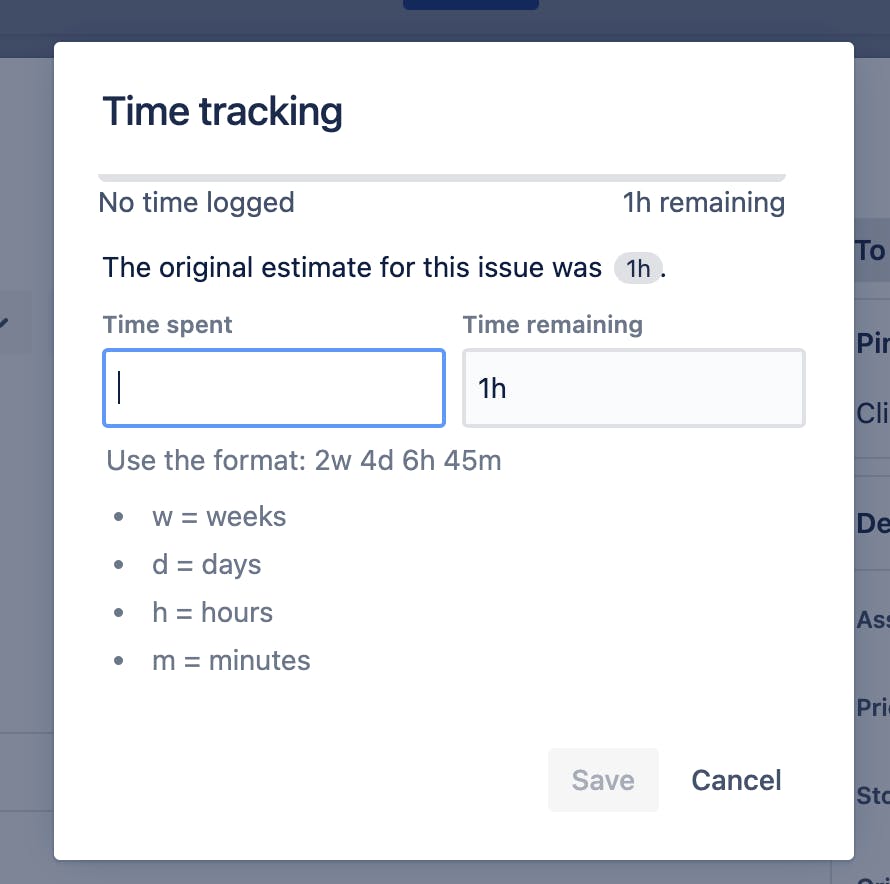
To record time spent on an issue click on it.
Click on time tracking to the right, enter time spent and the time remaining will update.
Change sprint columns
Click into the board settings and click columns
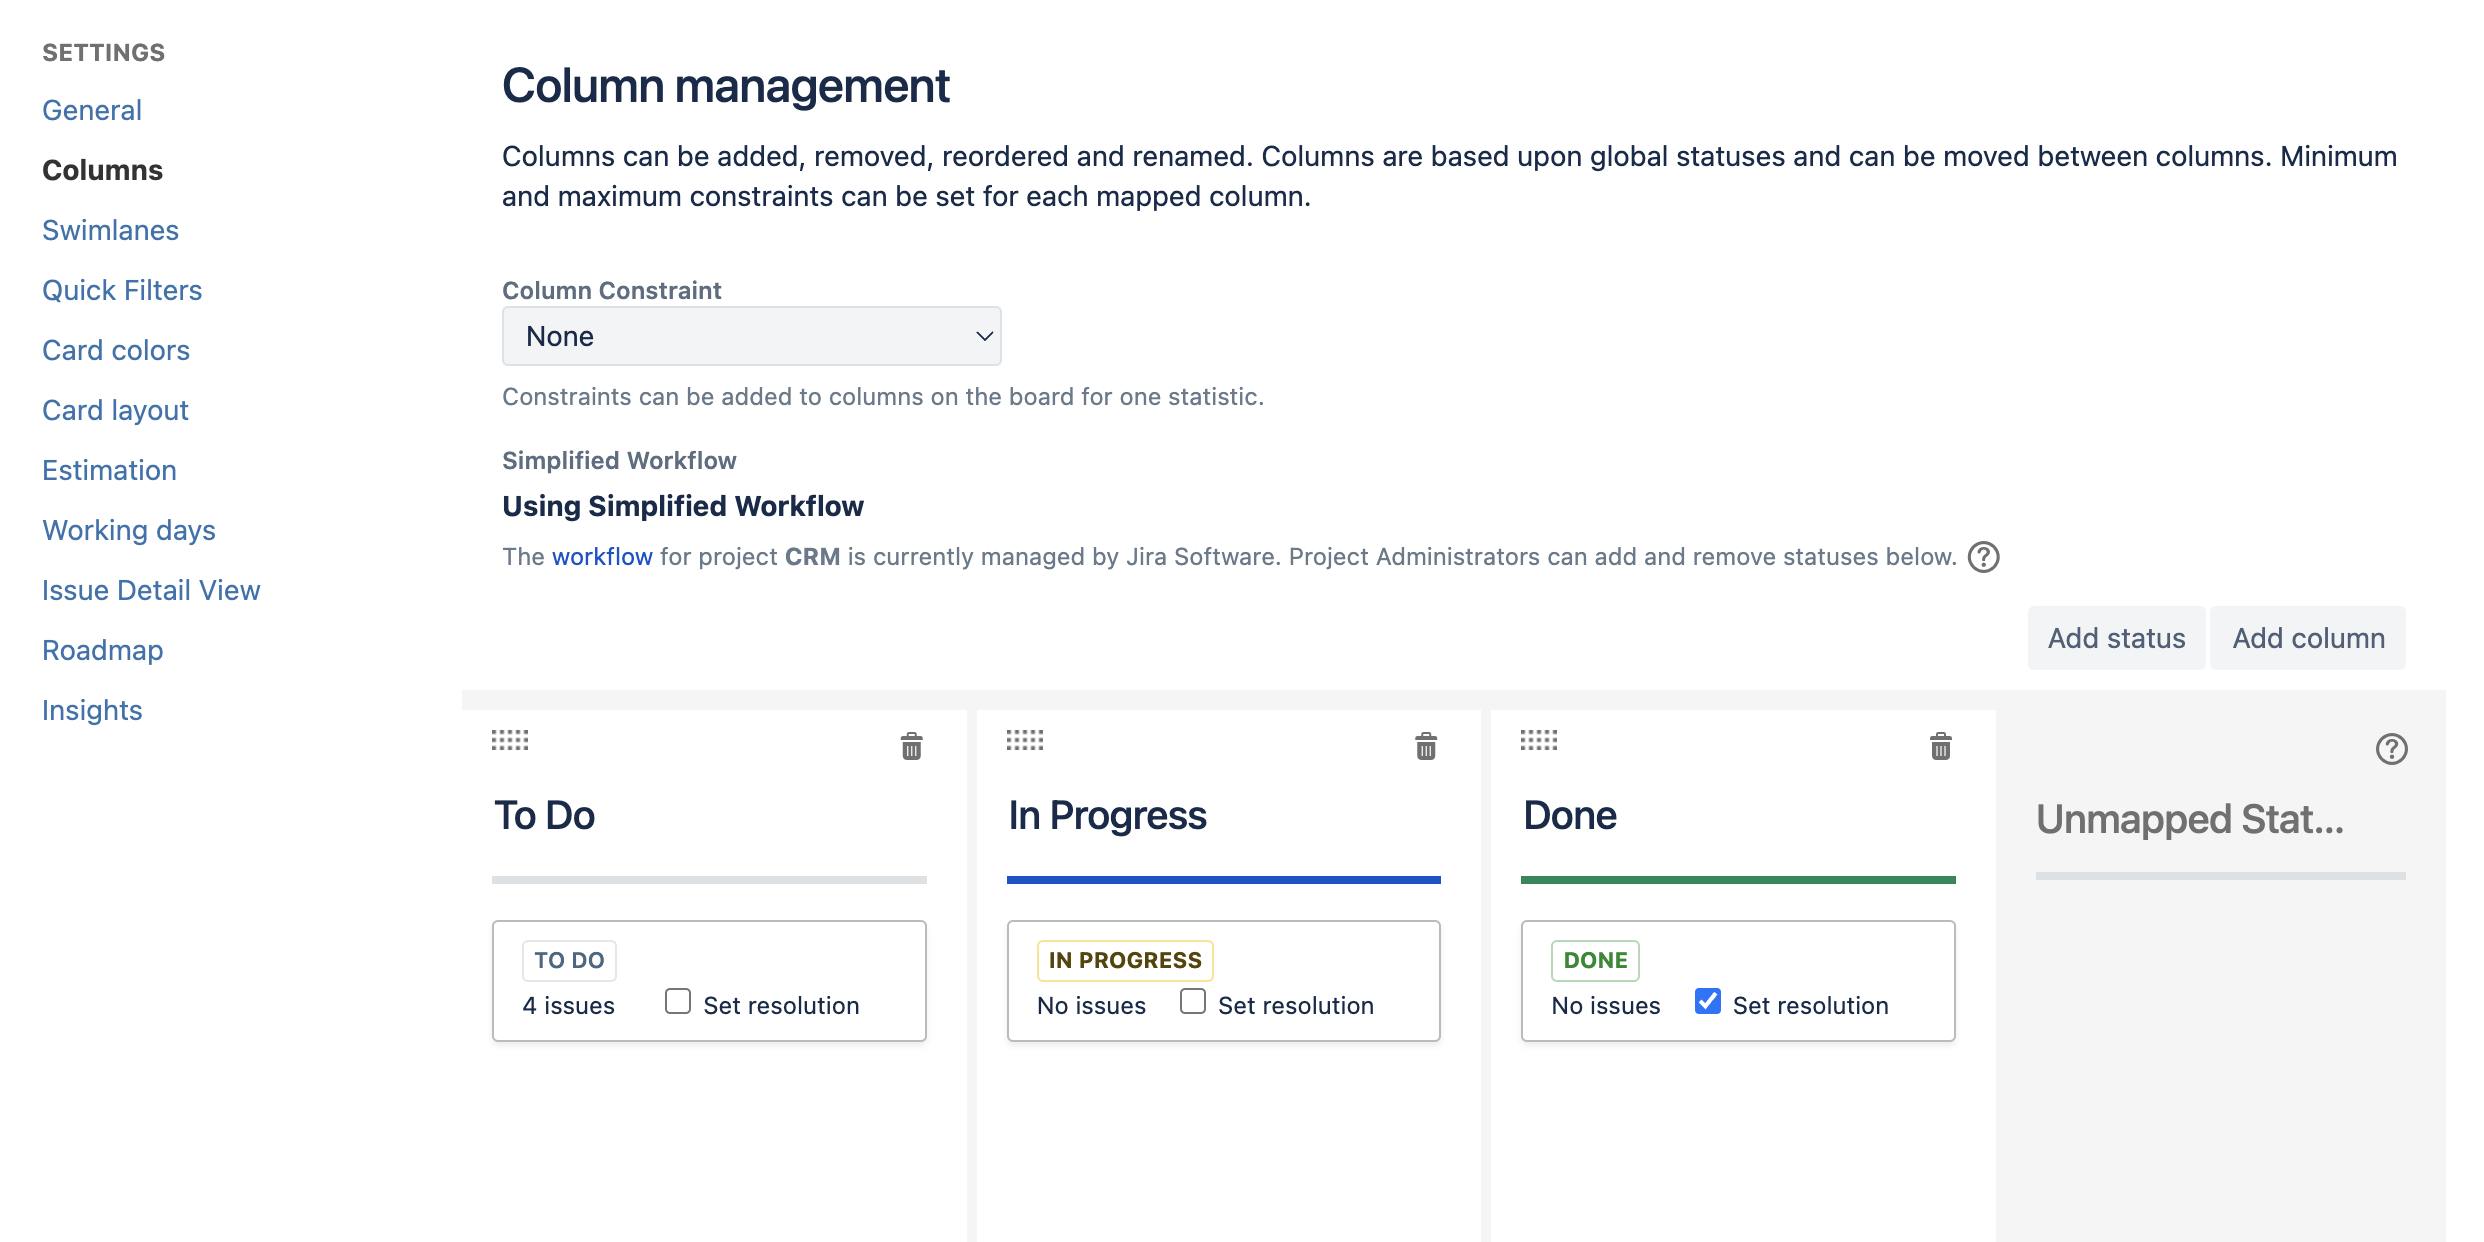
From here you can add statuses and columns. To add a new column click Add Column enter a name, and set a category as needed. I leave In Progress selected. Next click Add to save.
I like to add 2 additional columns Review and Re-work
Review for when a pull request is opened to review the changes
Re-work is used for any changes needed to the pull request
Going back to the sprint now shows the new columns.